iBuyPower Element Gaming PC Review: i7-8086K and GTX 1080 Ti Inside
by Joe Shields on July 6, 2018 10:00 AM ESTUnboxing and Visual Inspection
Purchasing a boxed system from a builder like iBuyPower the device arrives at users houses fully assembled and ready to go. The only setup needed are plugging in the mouse and keyboard, internet, video cable, and power cable. Once plugged in it should be as simple as hitting the power button, walking through Windows configuration, and voilà its ready to install the games one wishes to play.
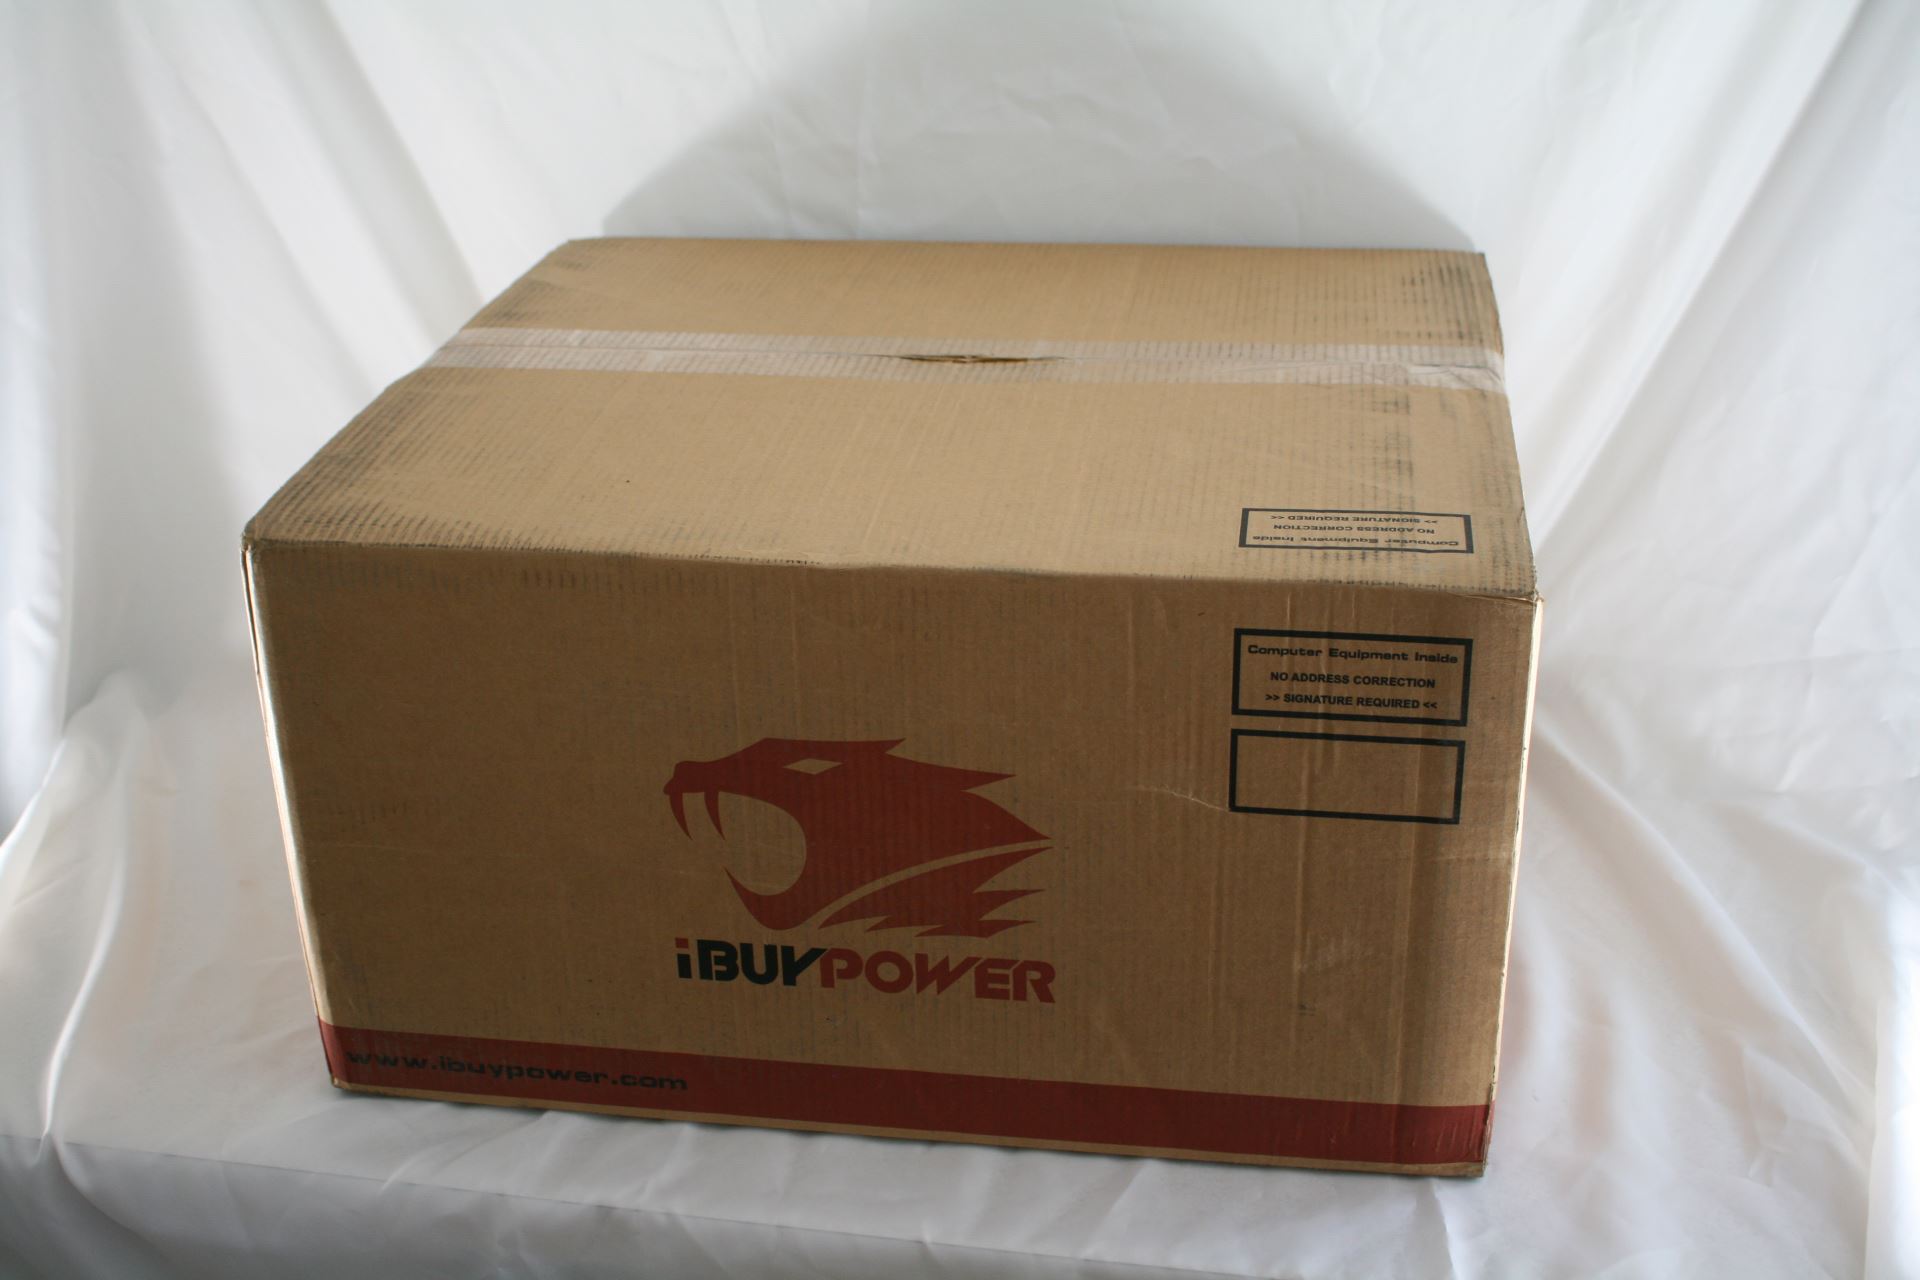
The iBuyPower PC arrived in a large box as seen above. The box is fairly nondescript outside of the iBuyPower logo and writing on four of the six sides. It is shipped in a box in a box manner to keep what is inside protected.
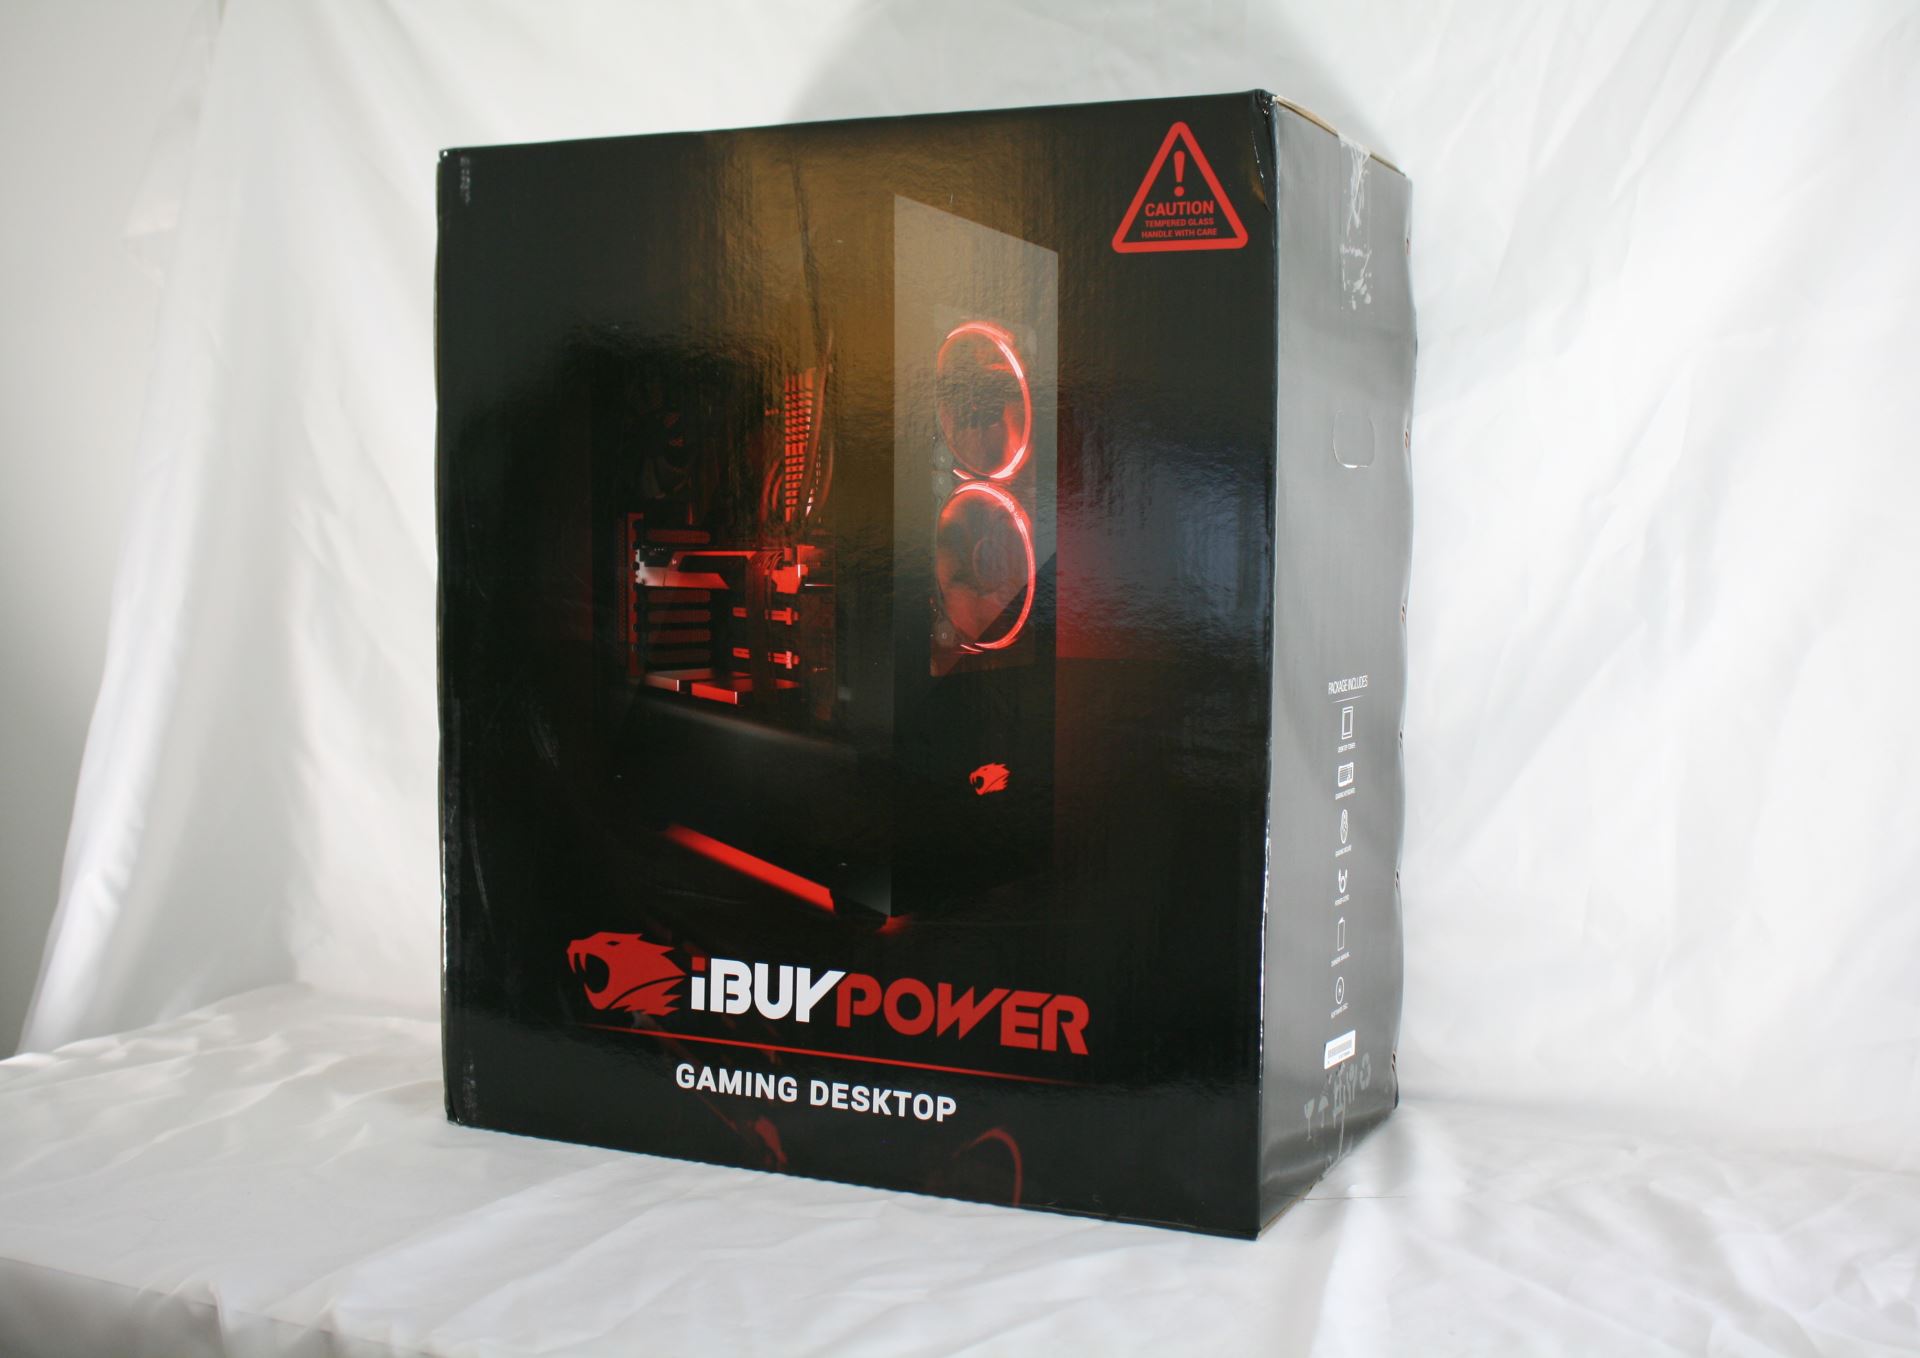
When opening up the box we are greeted with our first glimpse of the system in the form of an image on another box. This is more of what one would see on shelves with the system sitting securely inside. The PC sits in styrofoam shell protecting the PC inside.
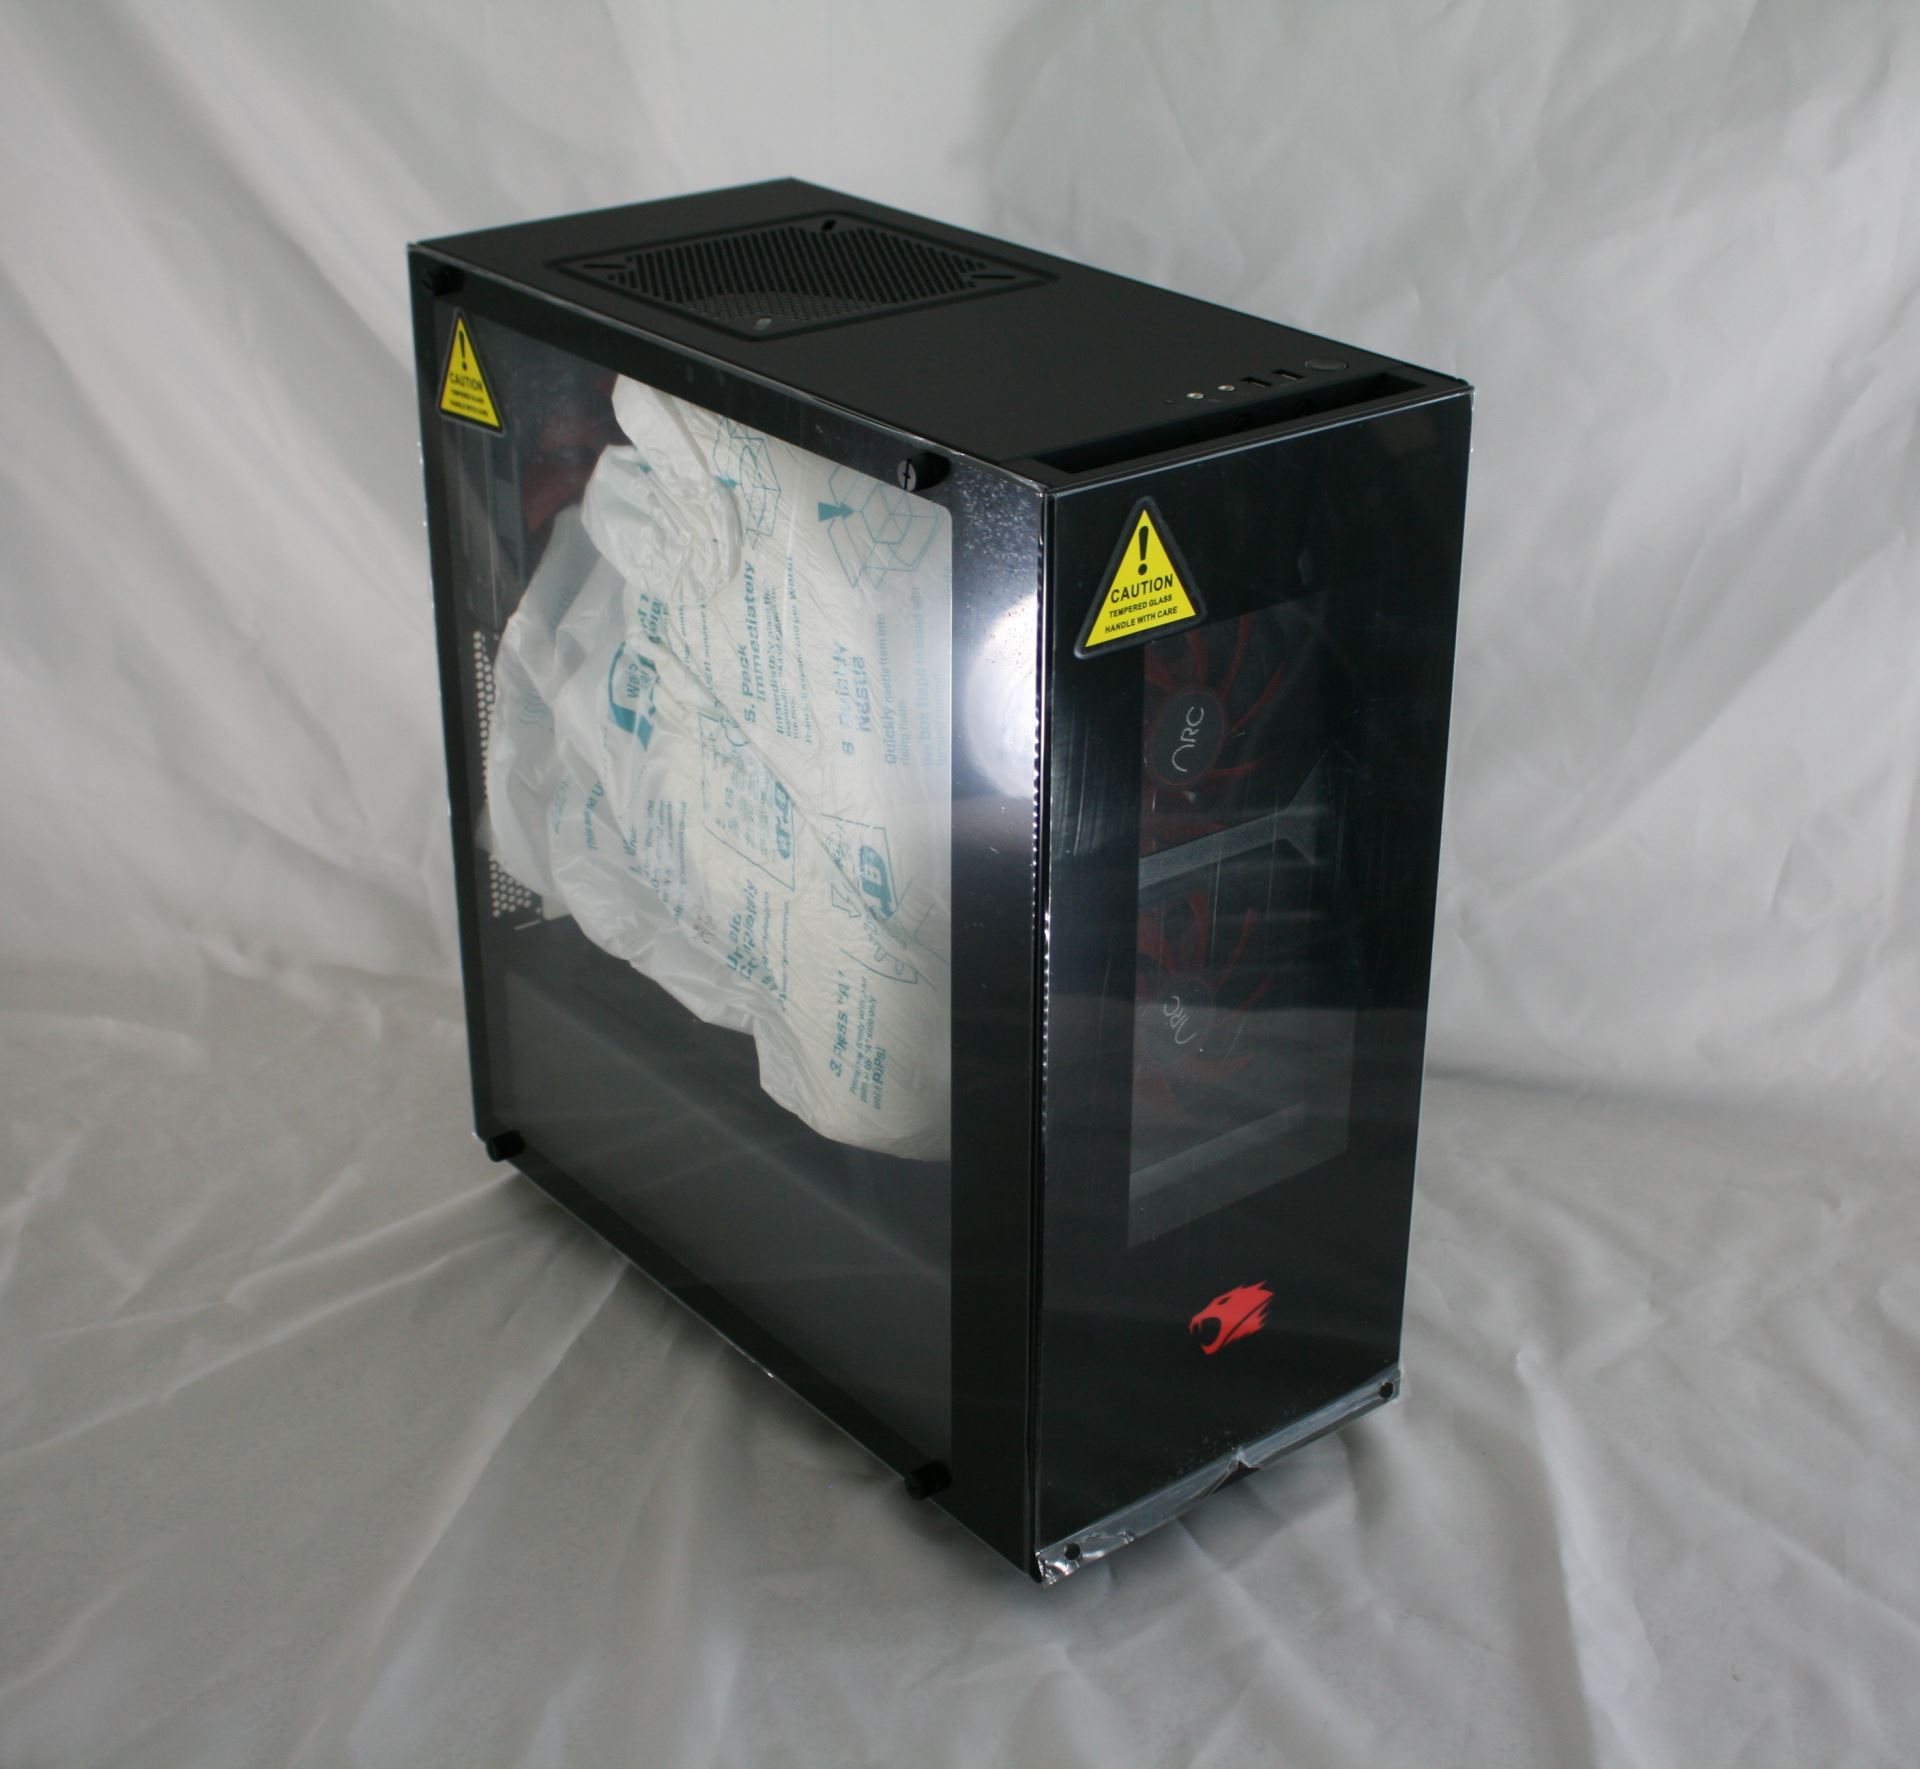
After we removed the PC from its box, we are left with what is pictured above. iBuyPower uses form-fitting materials inside to hold all the components in place while in transit. The tempered glass panels each have a protective film over it to prevent any damage to the glass itself.
Overall the system is packaged well and should handle the bumps and bruises of shipping with how the unit is enclosed. It has both box in box protection and sits suspended from the box panels and edges so it should arrive at the buyer's house as pristine as it left the factory.
iBuyPower Element i7 8086K
We'll first display some stock images and then poke around on the inside. The case used in the Element chassis uses two tempered glass panels with one on the front with their logo lit up, and one on the sides showing off the internals. Overall it's a good looking case without some of the curious angles we have seen in some designs. The simple design and use of tempered glass panels gives the case a more expensive appearance as opposed to acrylic sided cases. The bare chassis structure is sourced from NZXT while glass front and sides are custom pieces tooled in-house.
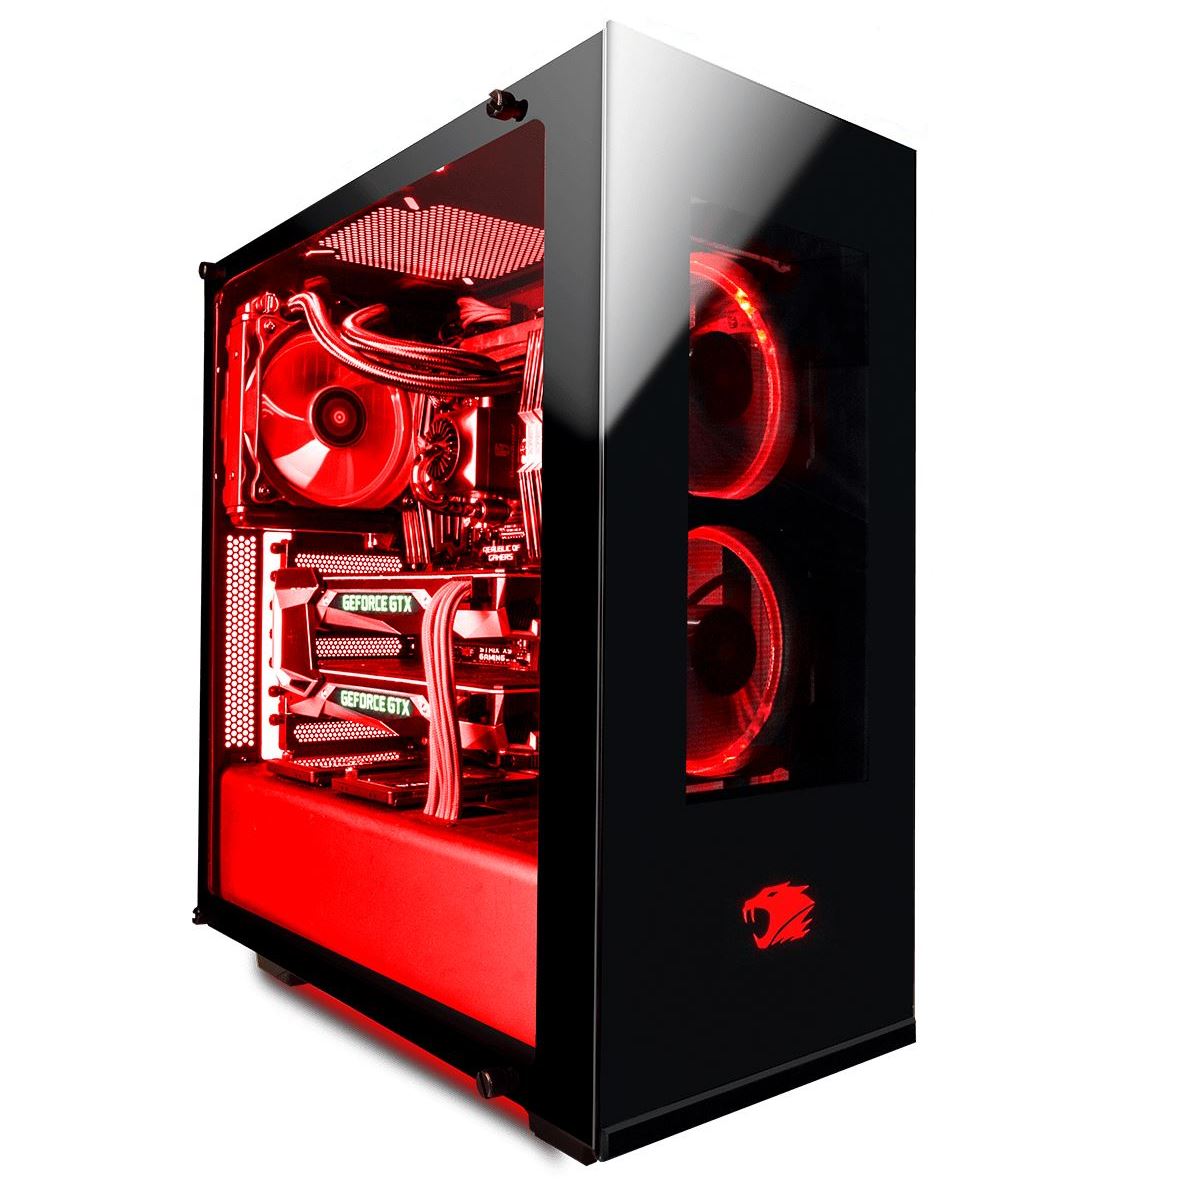
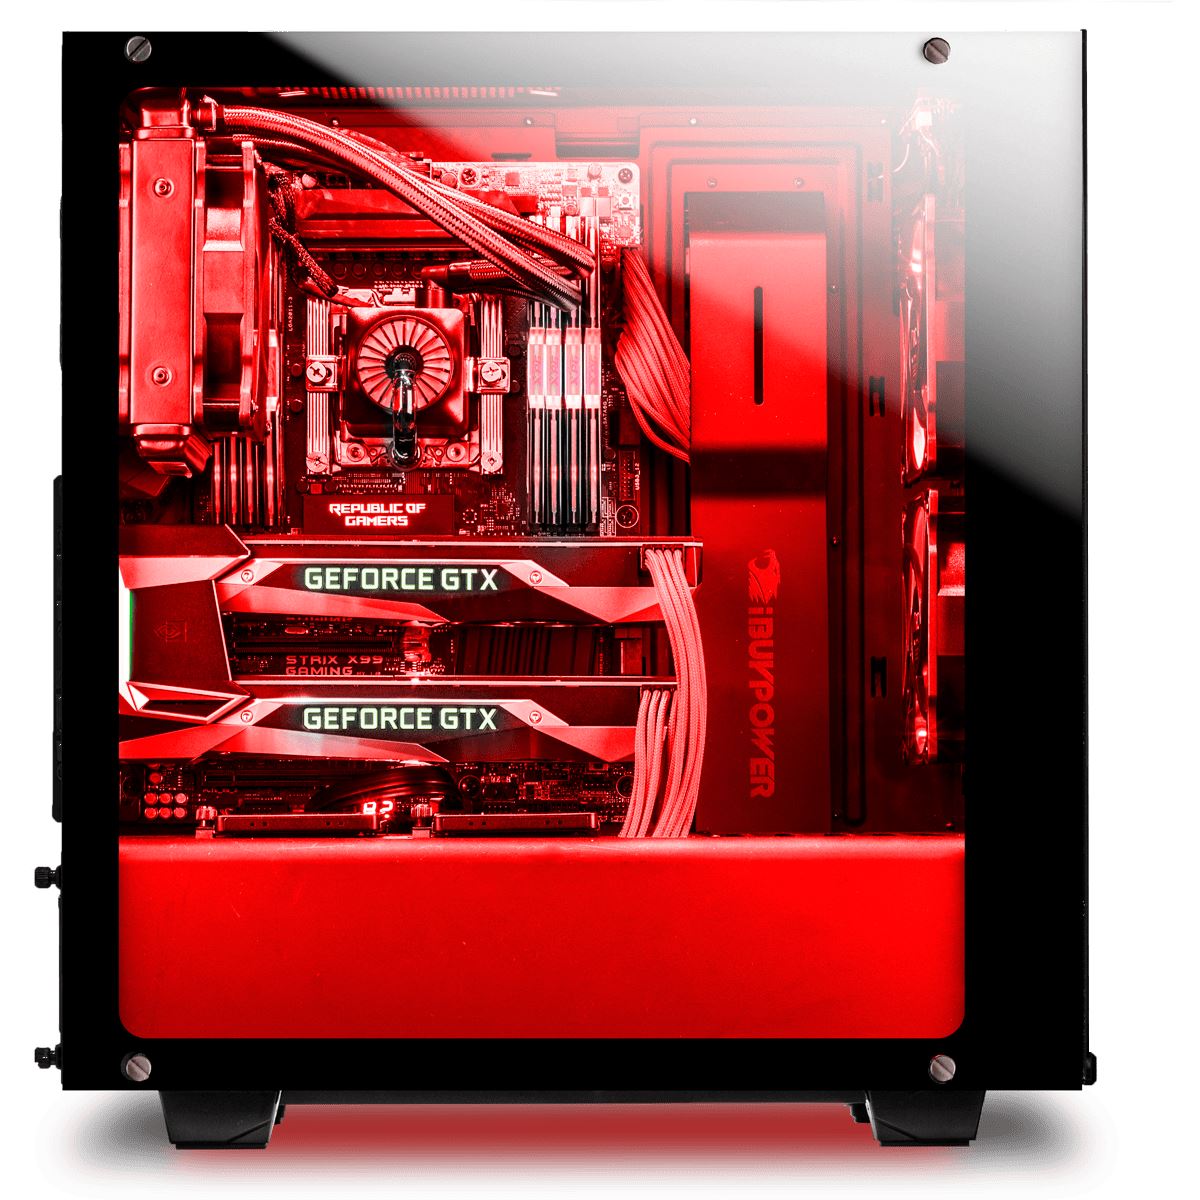
iBuyPower ships the case with 3 ARC RGB LED fans giving it a nice red glow out of the box. Internally, the ASUS TUF Z370-Pro Gaming motherboard and the ADATA Spectrix D41 RAM further illuminates the interior of the case, with the latter two customizable through the Aura Sync software. In regards to airflow, there is plenty of space on the top and bottom of the front panel to let cool air through a removable dust filter. The IO panel sits up at the top of the case for easy access and there is another fan location for additional airflow as well.

Taking the glass side panel off via four thumbscrews expose a fairly roomy interior with all the components housed inside. Our initial look shows the case will fit up to ATX sized motherboards and we can see a large shroud over the power supply to cover up unsightly cables. To the right of the motherboard and video card, we can see additional shrouds for cleaning up the cables mounted to the chassis as well as two 120mm fans for intake.
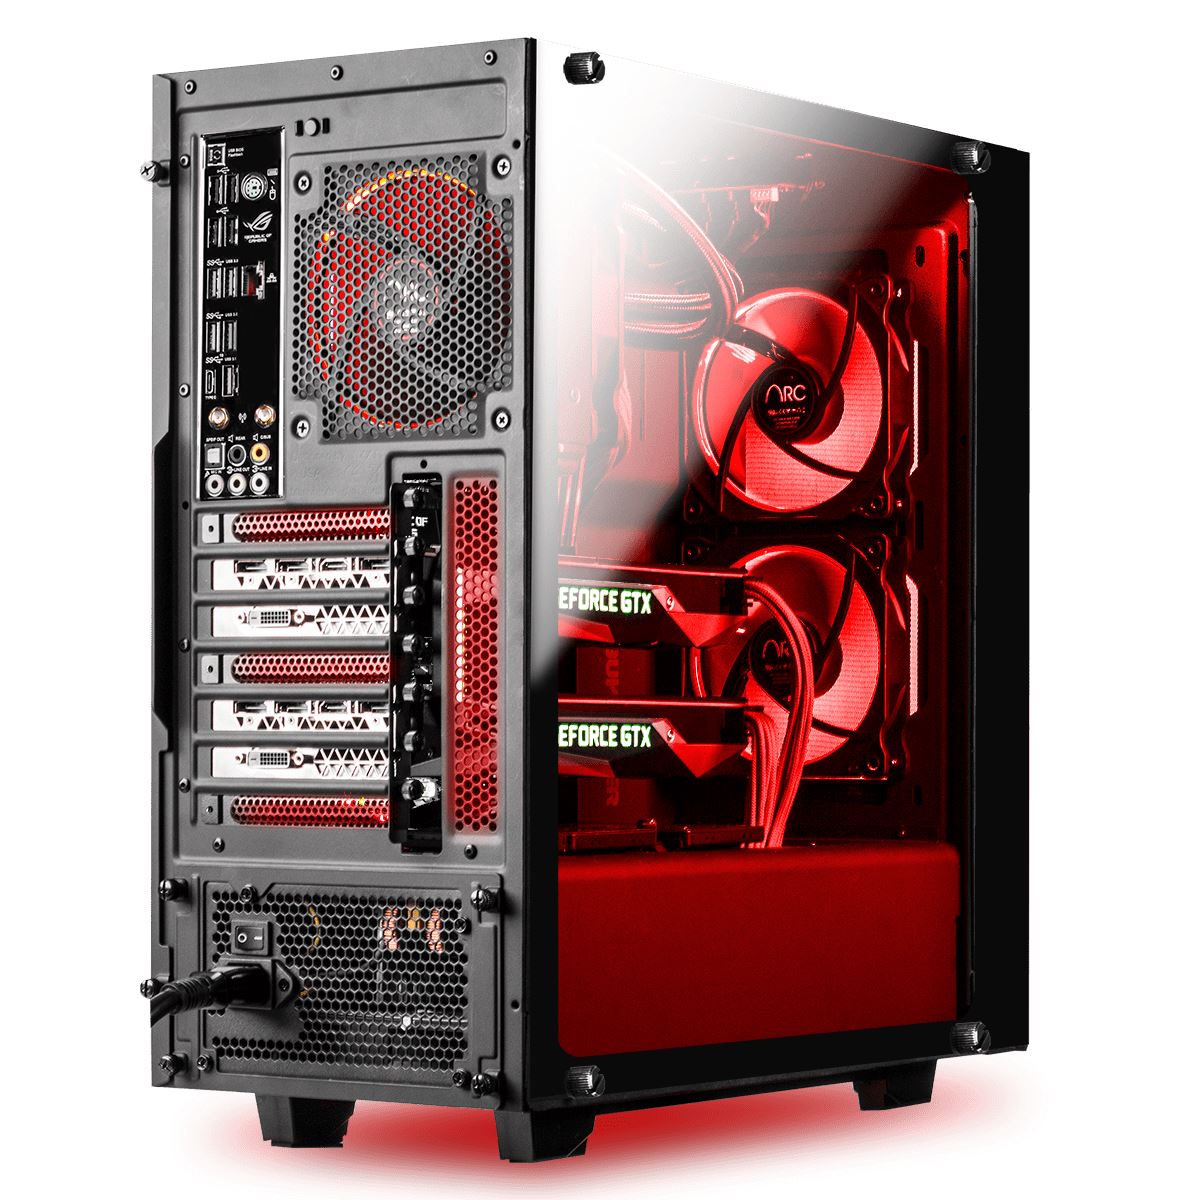
Twisting the case a bit to expose more of the front fans, we can see there is room for two 120mm fans as well as being able to support two 140mm fans or 2x120/2x140mm radiators. Between the front glass panel and the fans is a removable dust filter to help keep the inside of the case clean. Up top, there is room for a 120mm/140mm fan. Below the front fan mount locations we see the louvered top of the power supply shroud, and beneath that the 3.5-inch Western Digital Caviar Blue HDD this model came equipped with. Further below that is another 3.5-inch drive bay.
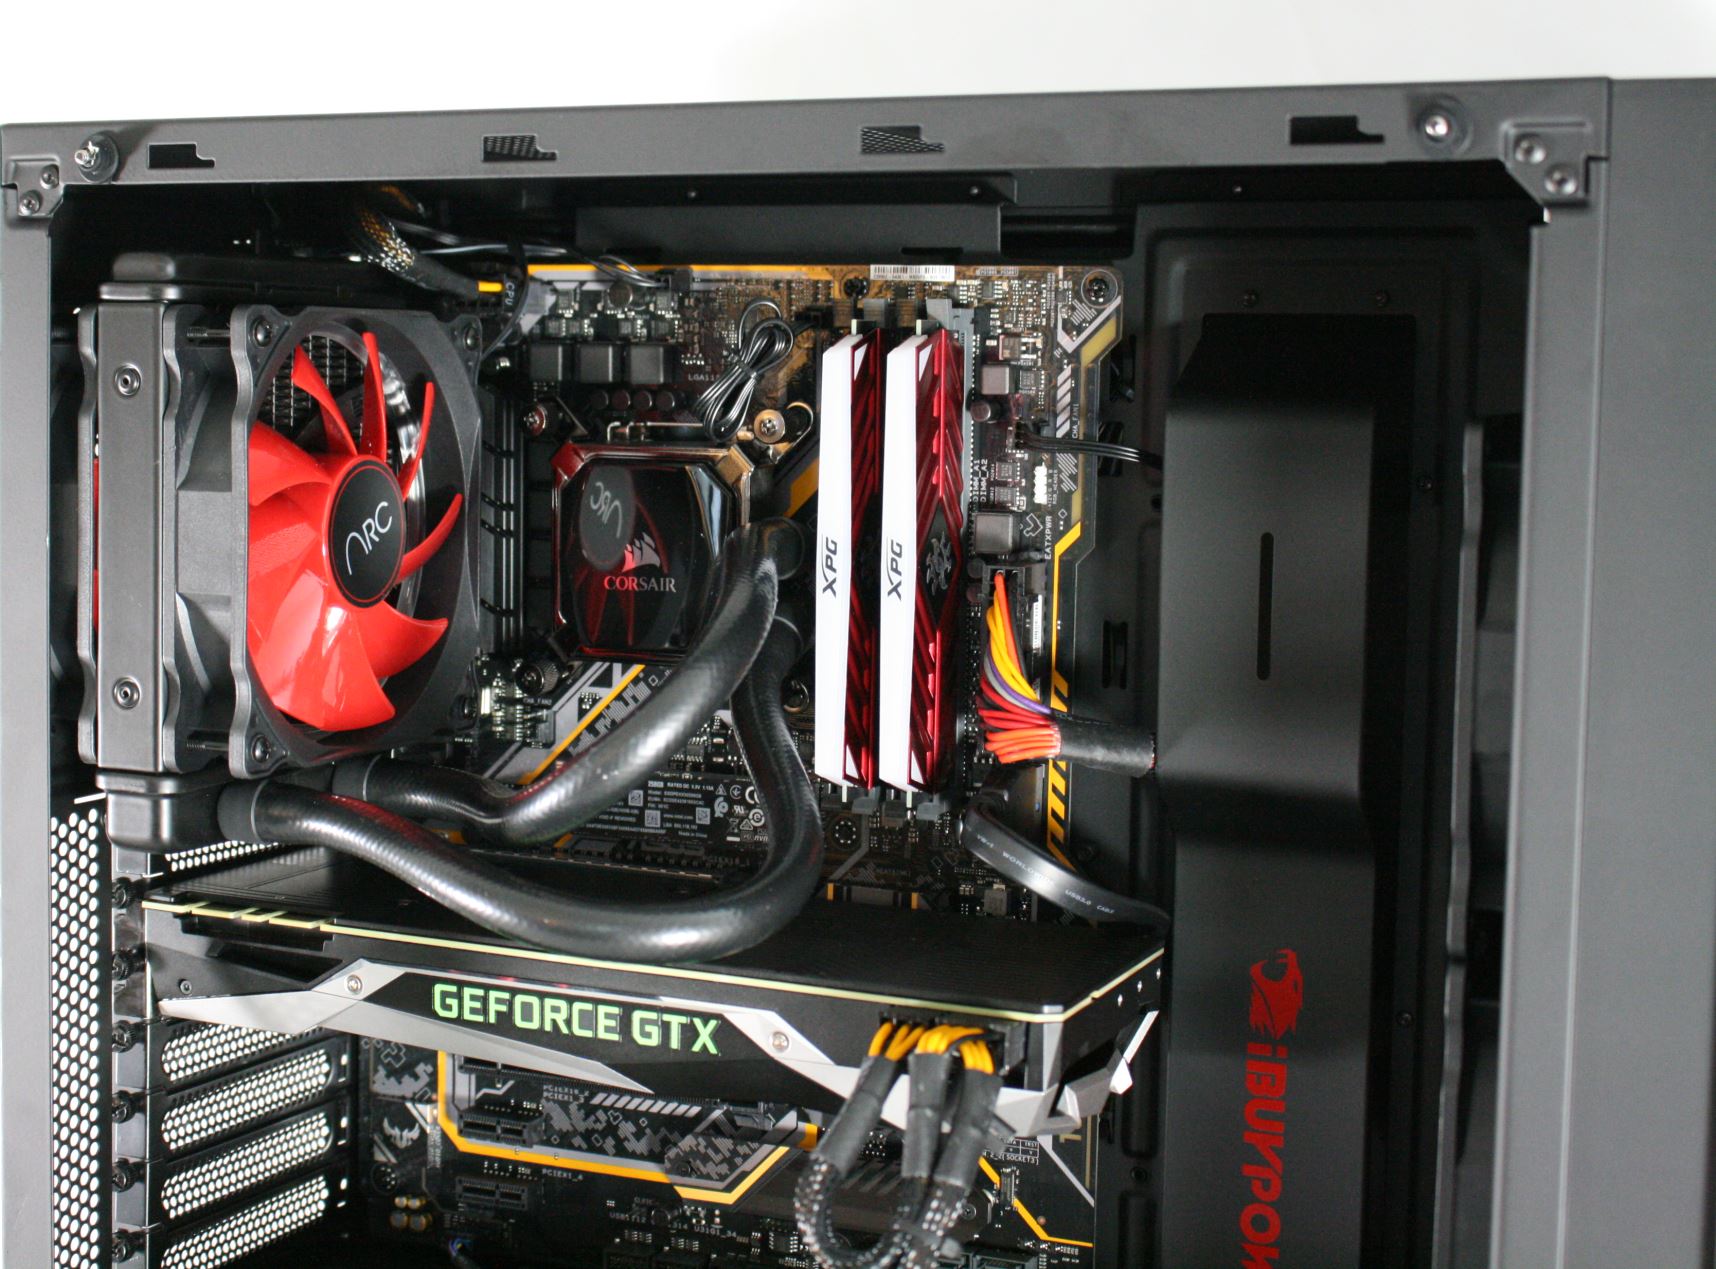
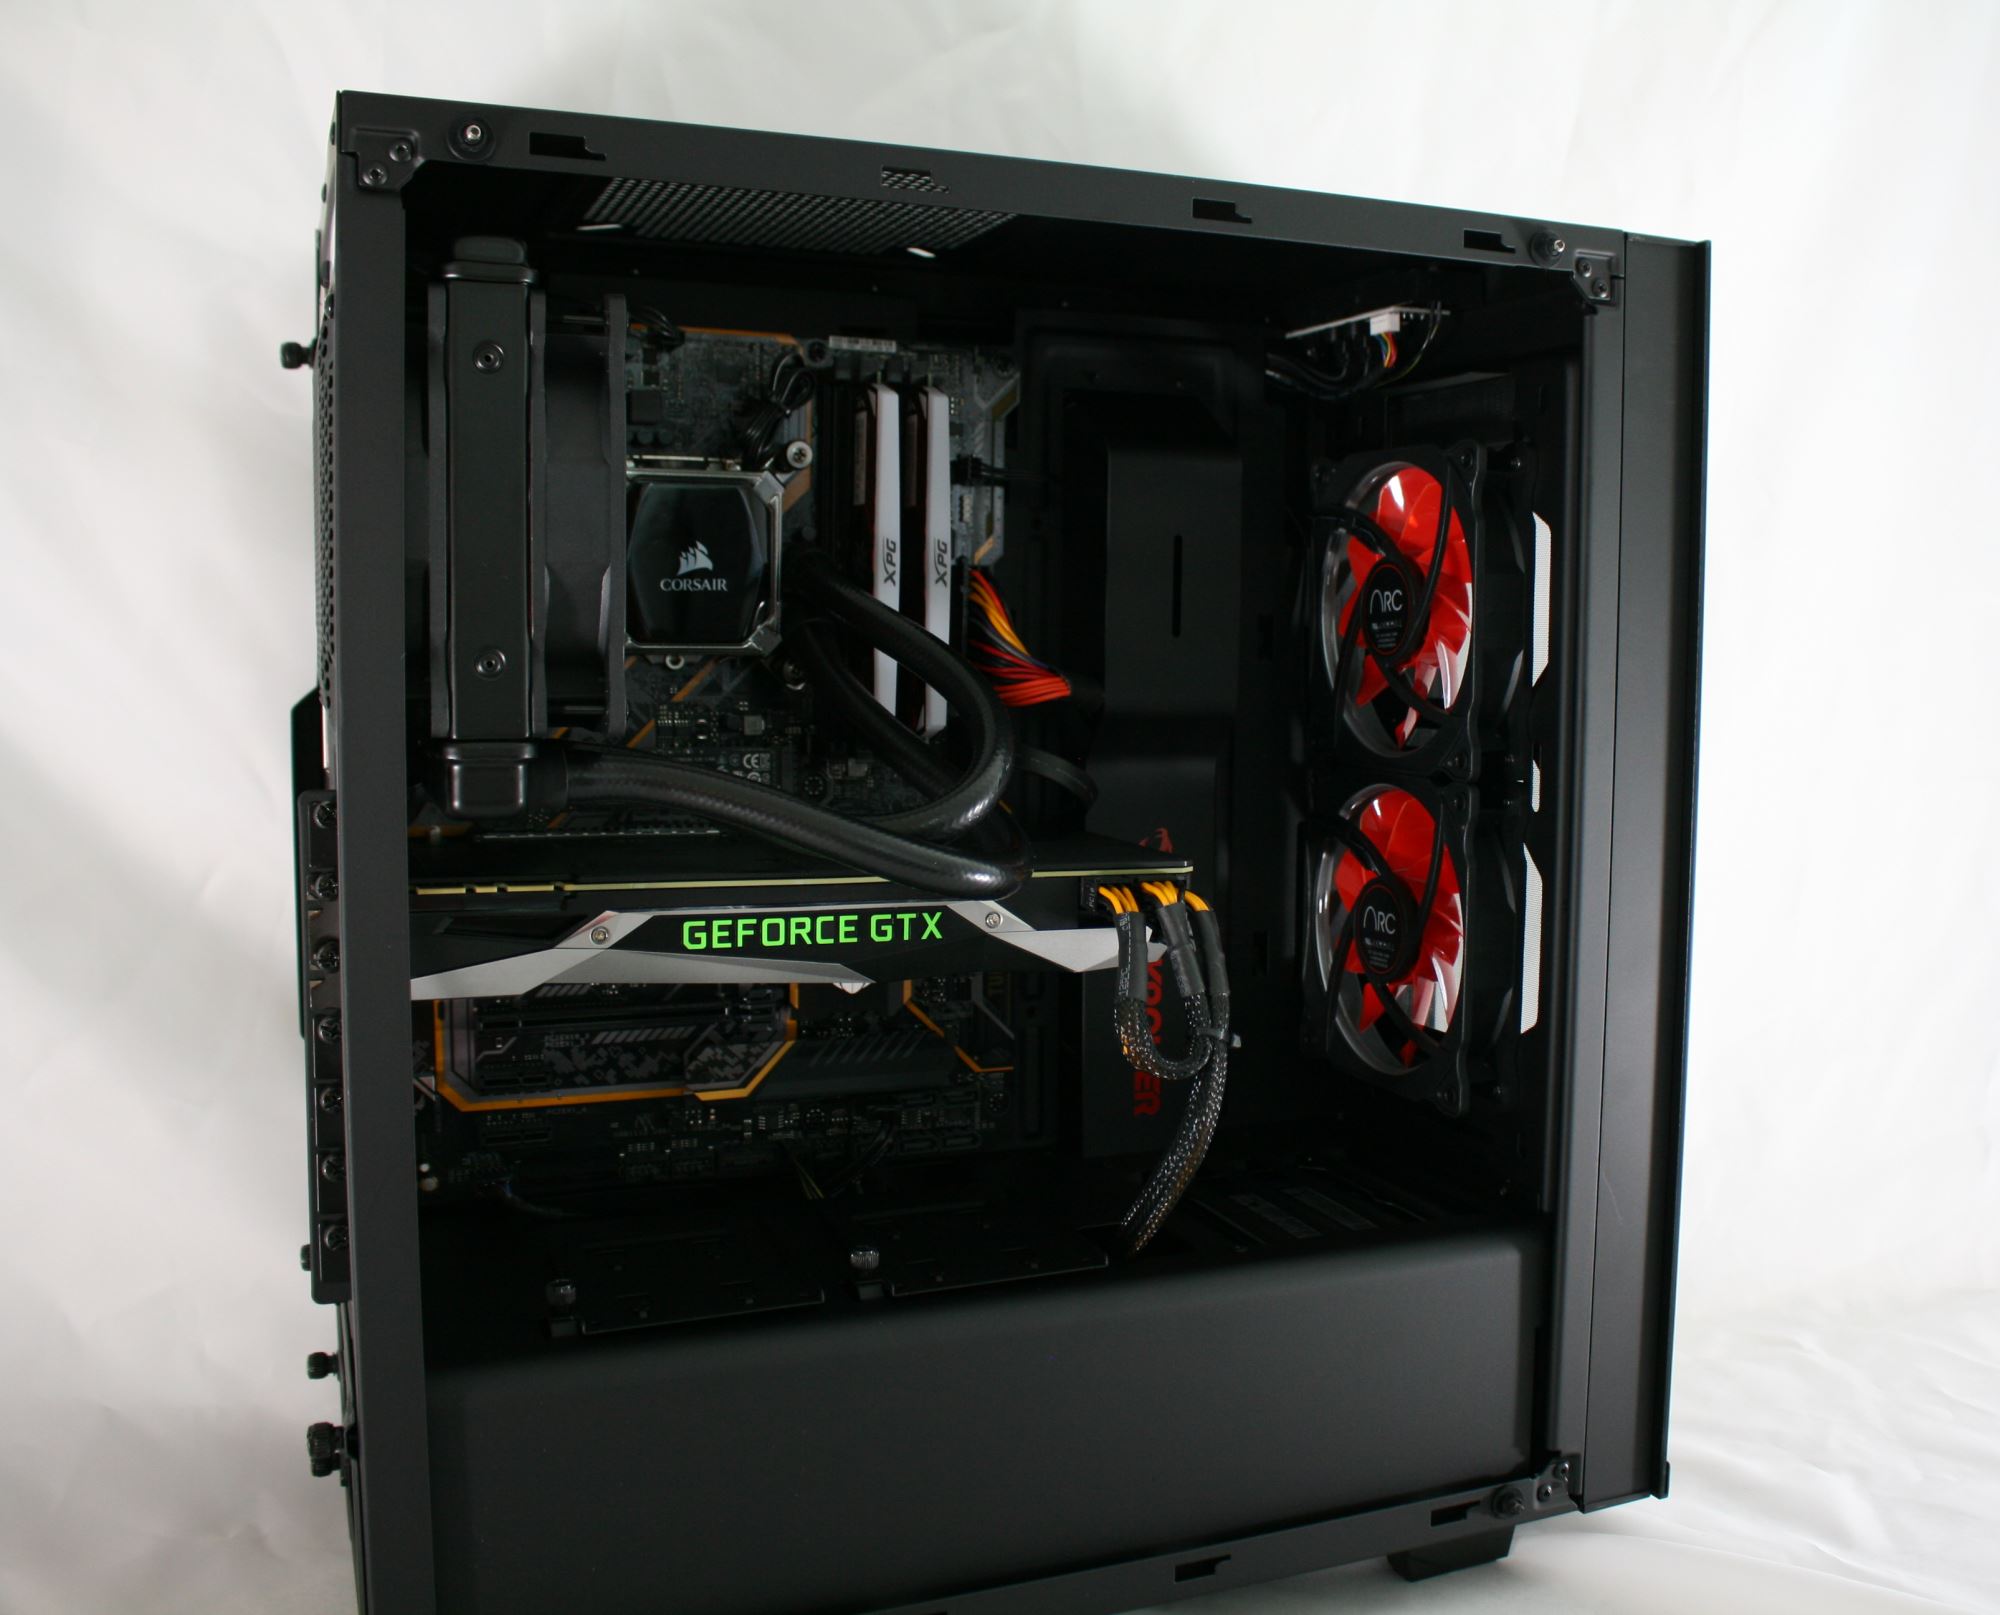
Sliding the case around again we are able to see a better shot of the rear 120mm fan mount which in this case has a Corsair H60 CLC unit mounted to cool the CPU. Shown in the top of this image are two of the four studs with rubber washers for attaching the tempered glass main panel.
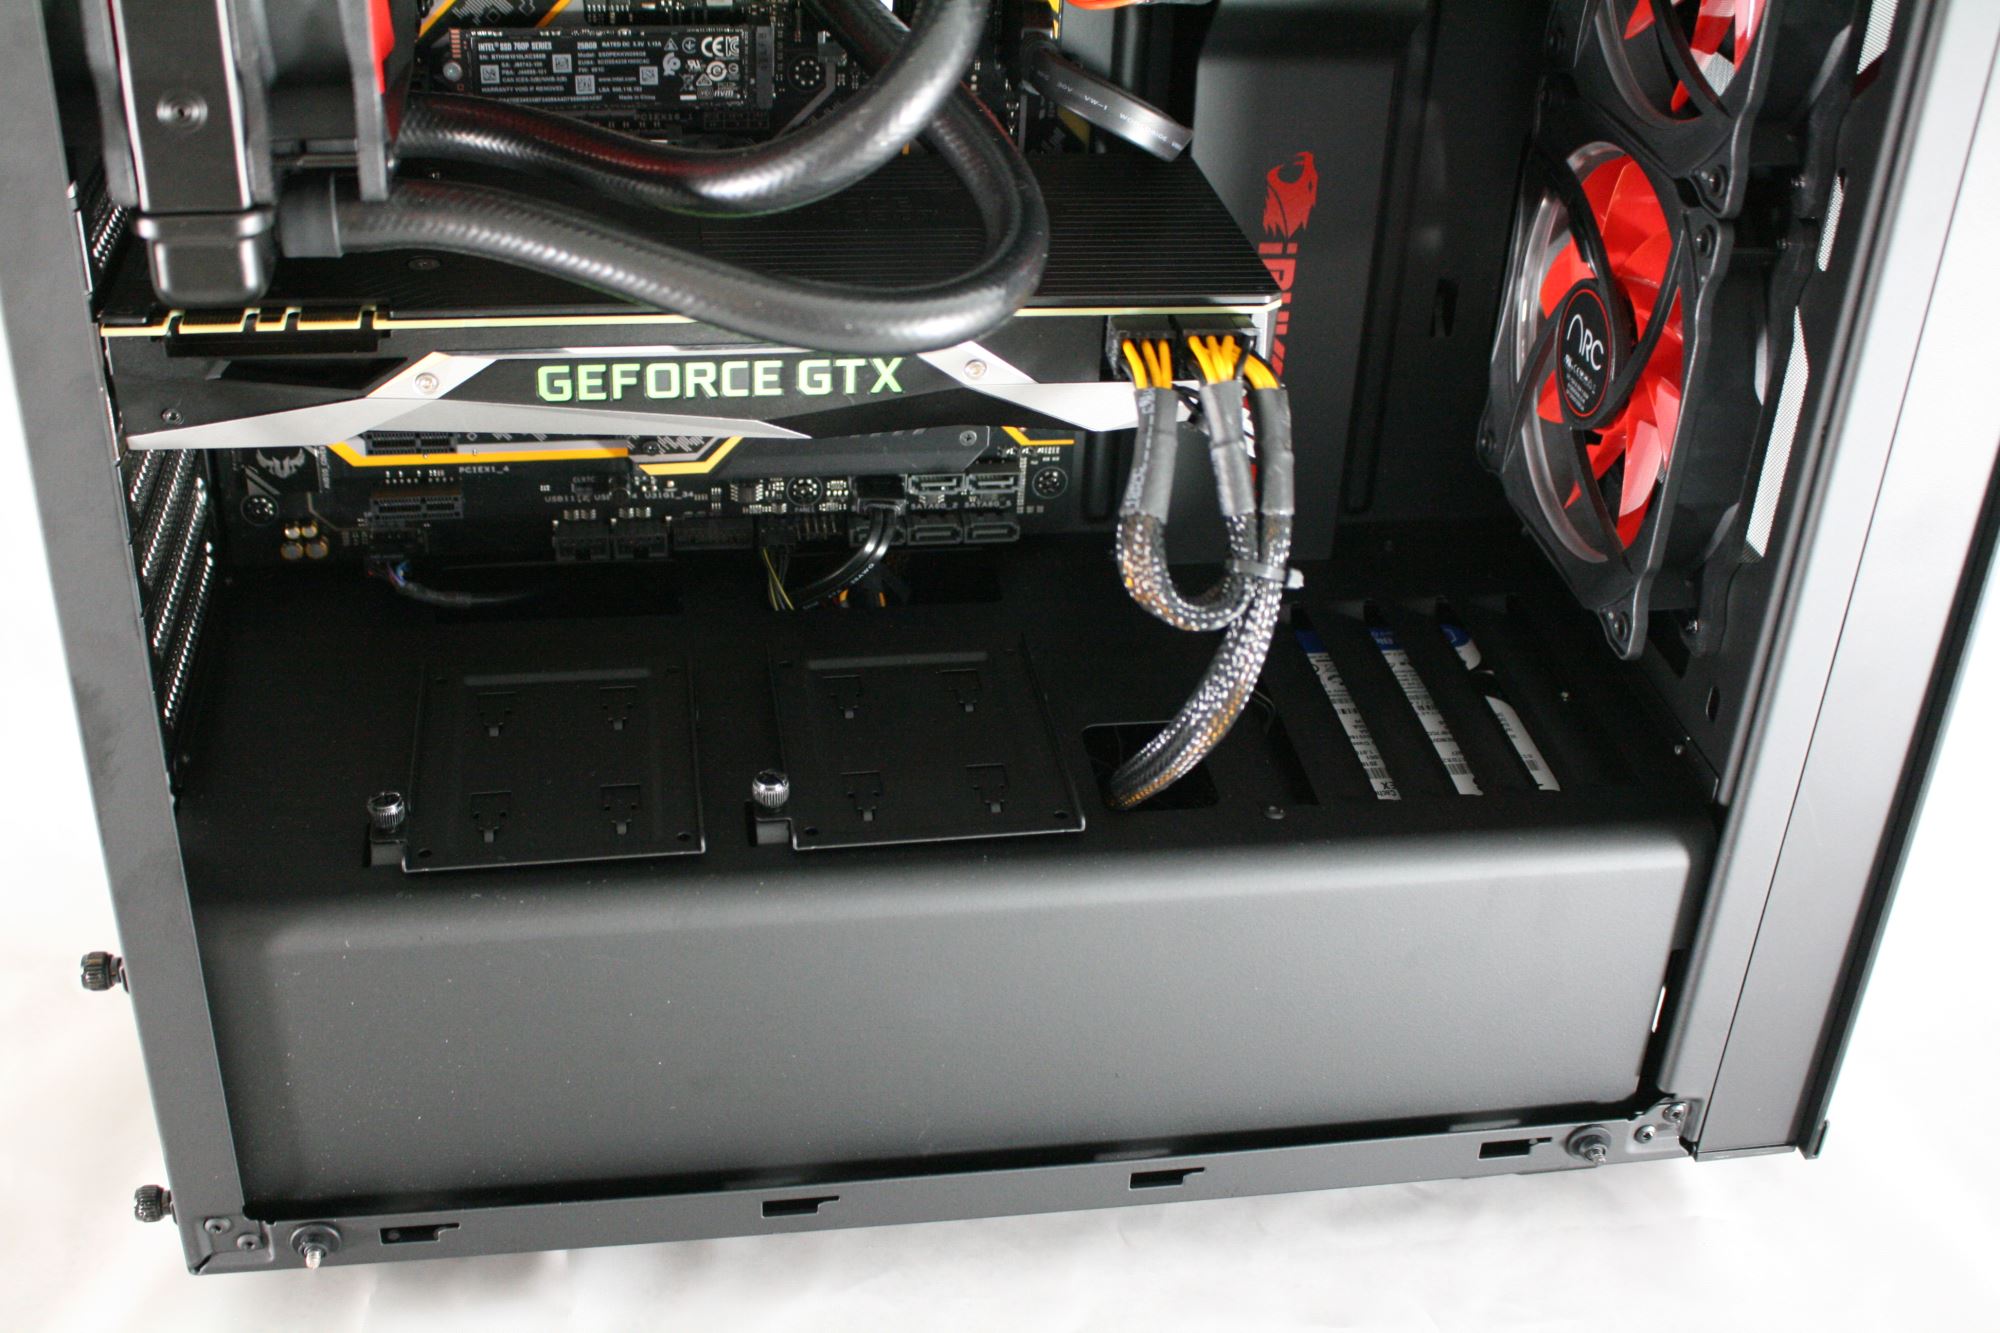
This image more clearly shows the shroud covering up the power supply and most of its cables as well as the two 2.5-inch mount points on the left which are removable via thumbscrews. The shroud has cutouts for cables that attach to the bottom of the motherboard as well as a cutout to route PCIe power cables as well making the interior case aesthetic clean with plenty of places to hide and route the wires.
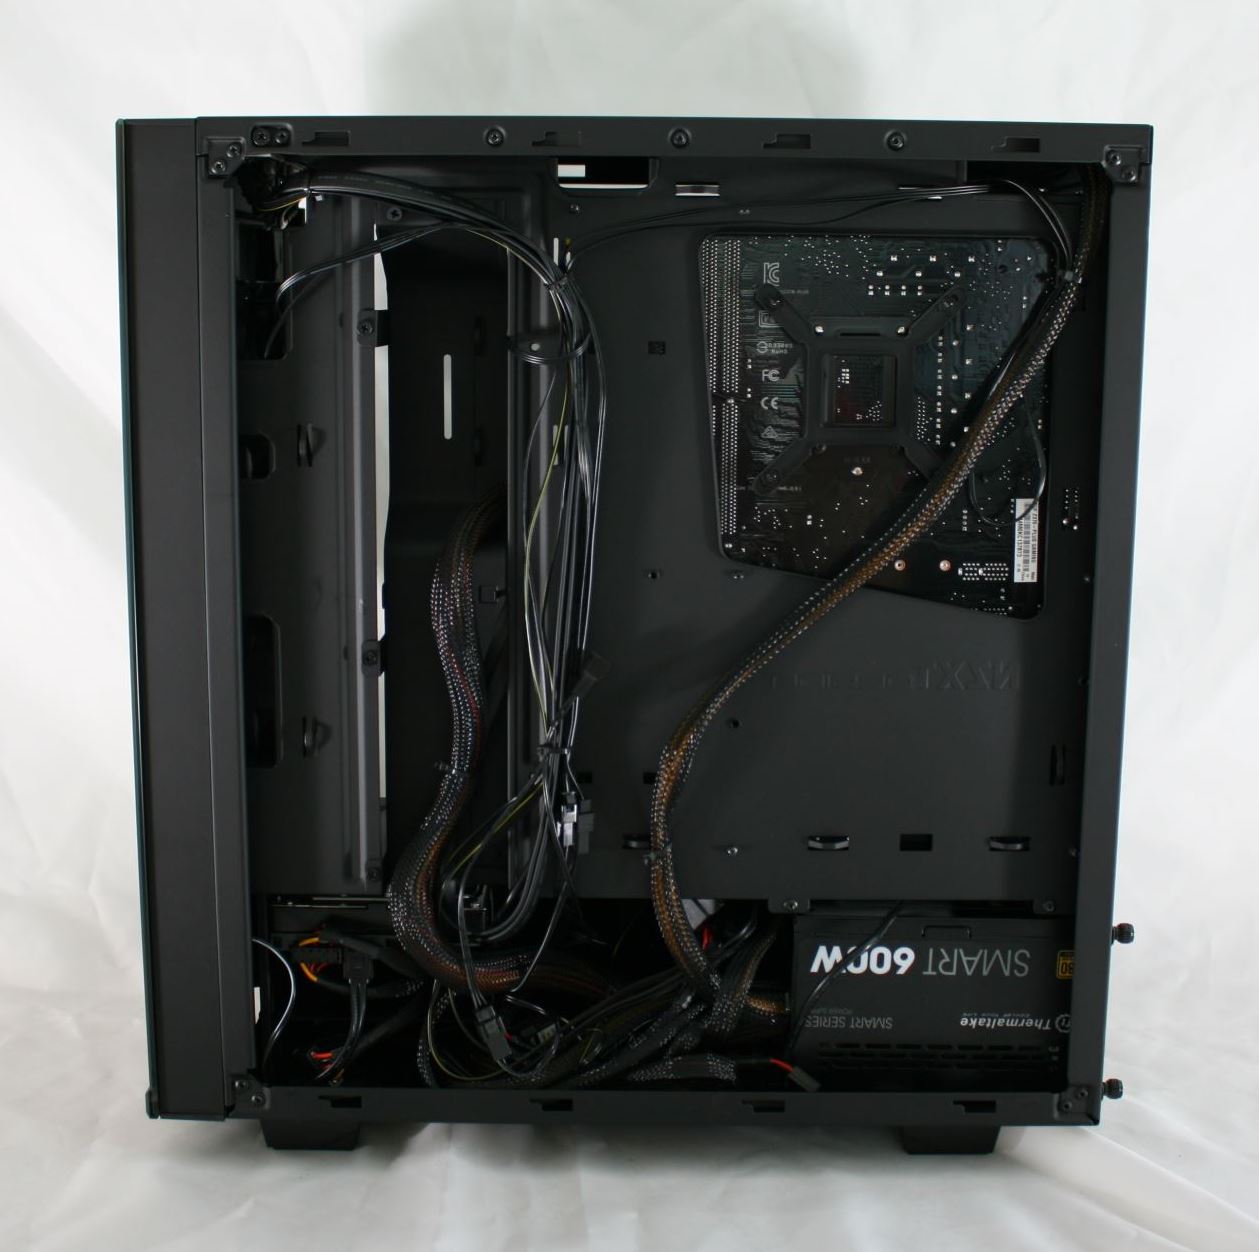
The back of the case has ample room for cables under the shroud as well as between the side panel and motherboard tray. There are multiple tie-down points for any other cables that also helps routing and cleaning up a jumble of wires. Routing the wires properly behind the tray can prevent side panel bulge we have seen on some other cases. There is a decent size trapazoid cutout exposing the back of the motherboard socket area for ease of mounting coolers.
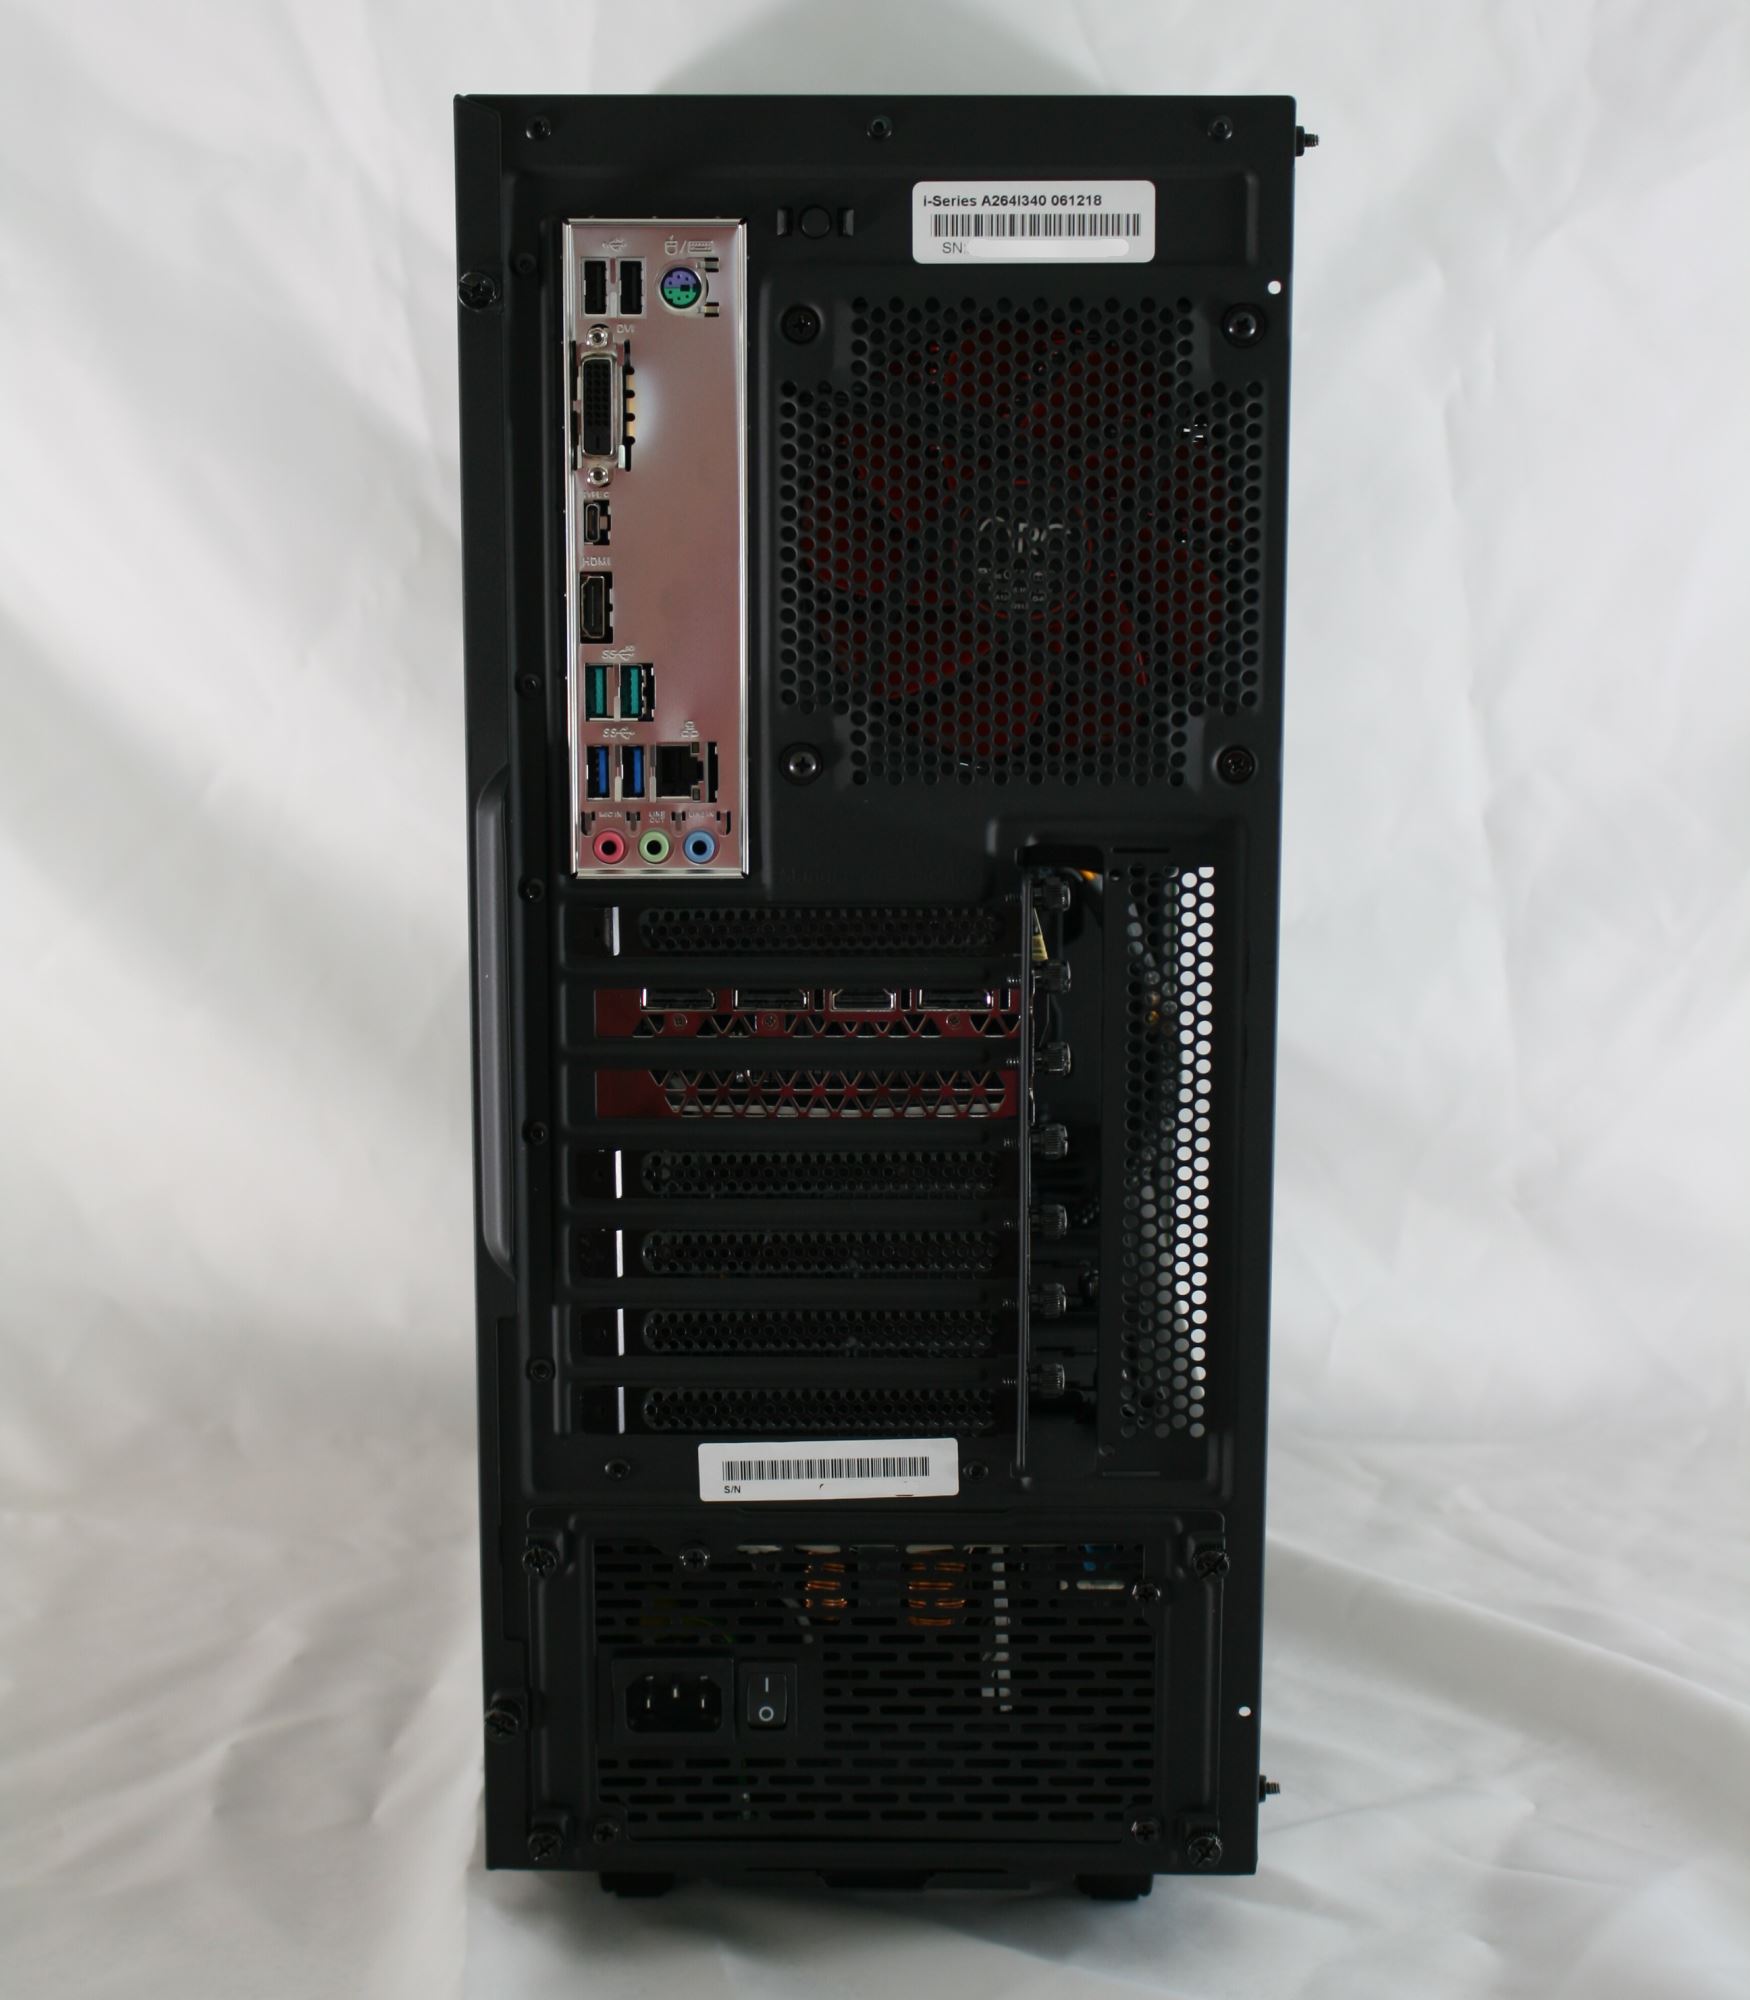
The back of the case shows the vented Thermaltake power supply at the bottom and just above that, seven expansions slots for additional PCIe cards are available.
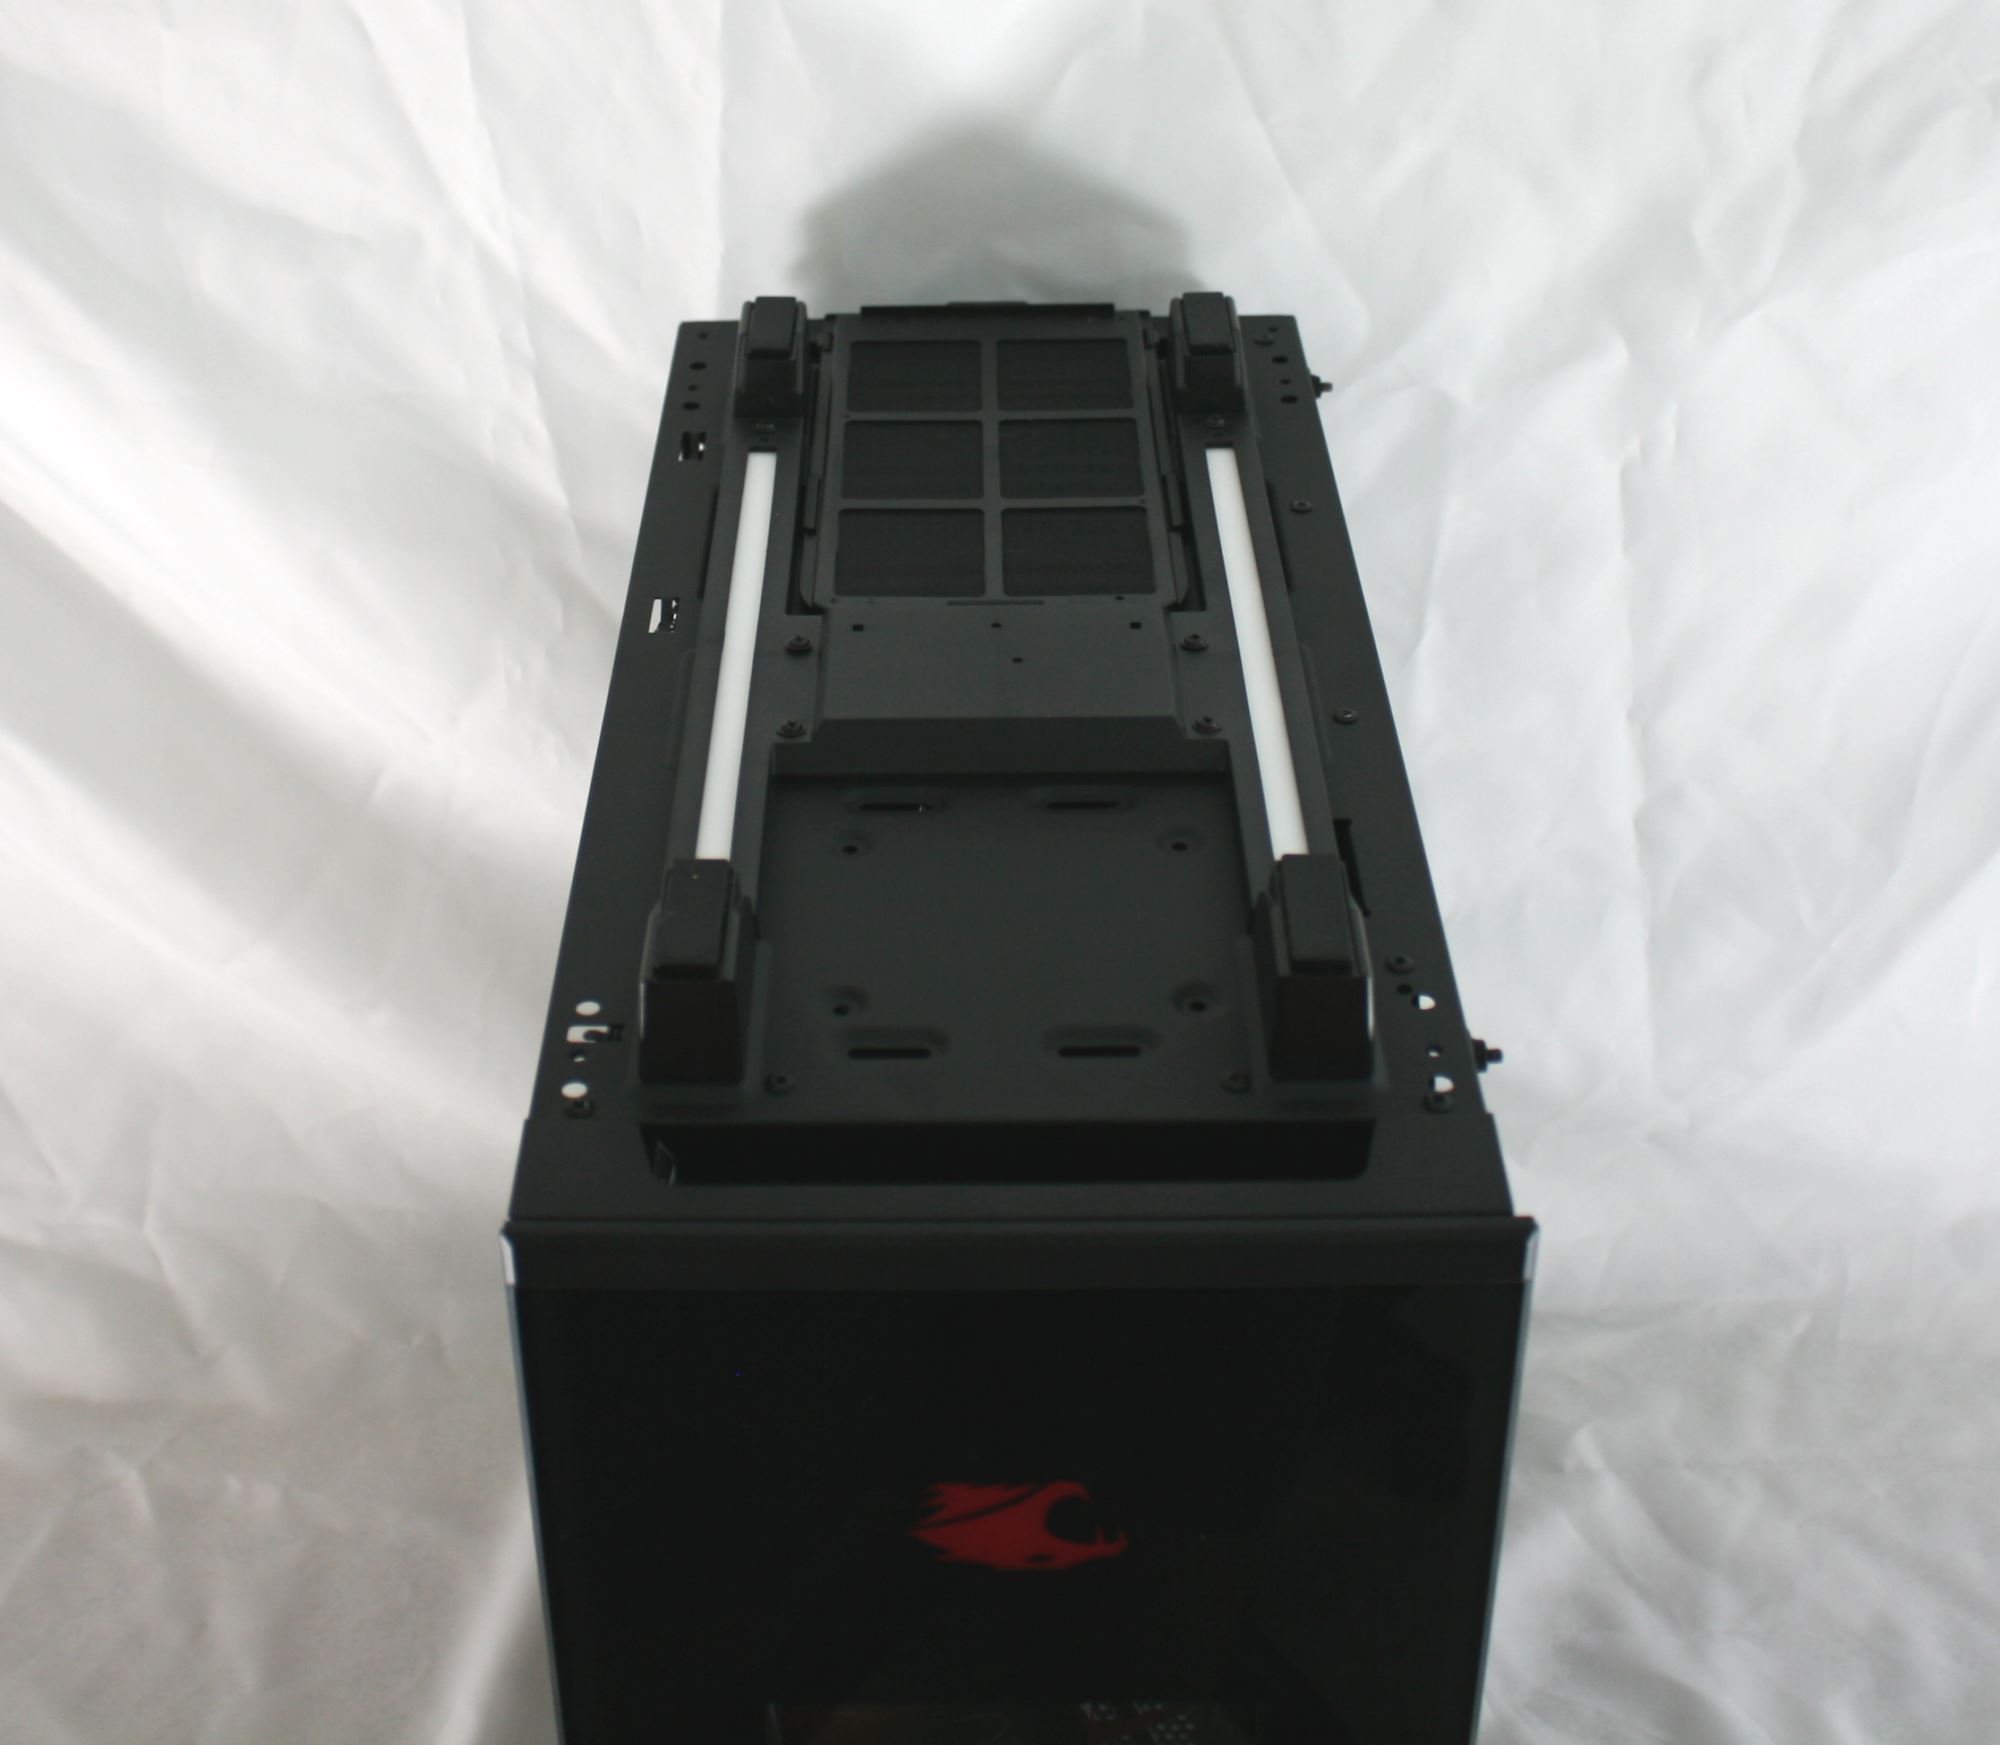
Flipping the case on its head, we are now able to see another removable dust filter, this time for the bottom mounted power supply. The white strips seen running along the length of the chassis are integrated RGB LED strips. The case stands on four feet raised up a bit over an inch from the bottom of the case which should allow for ample airflow (except perhaps on the most shag of carpets).
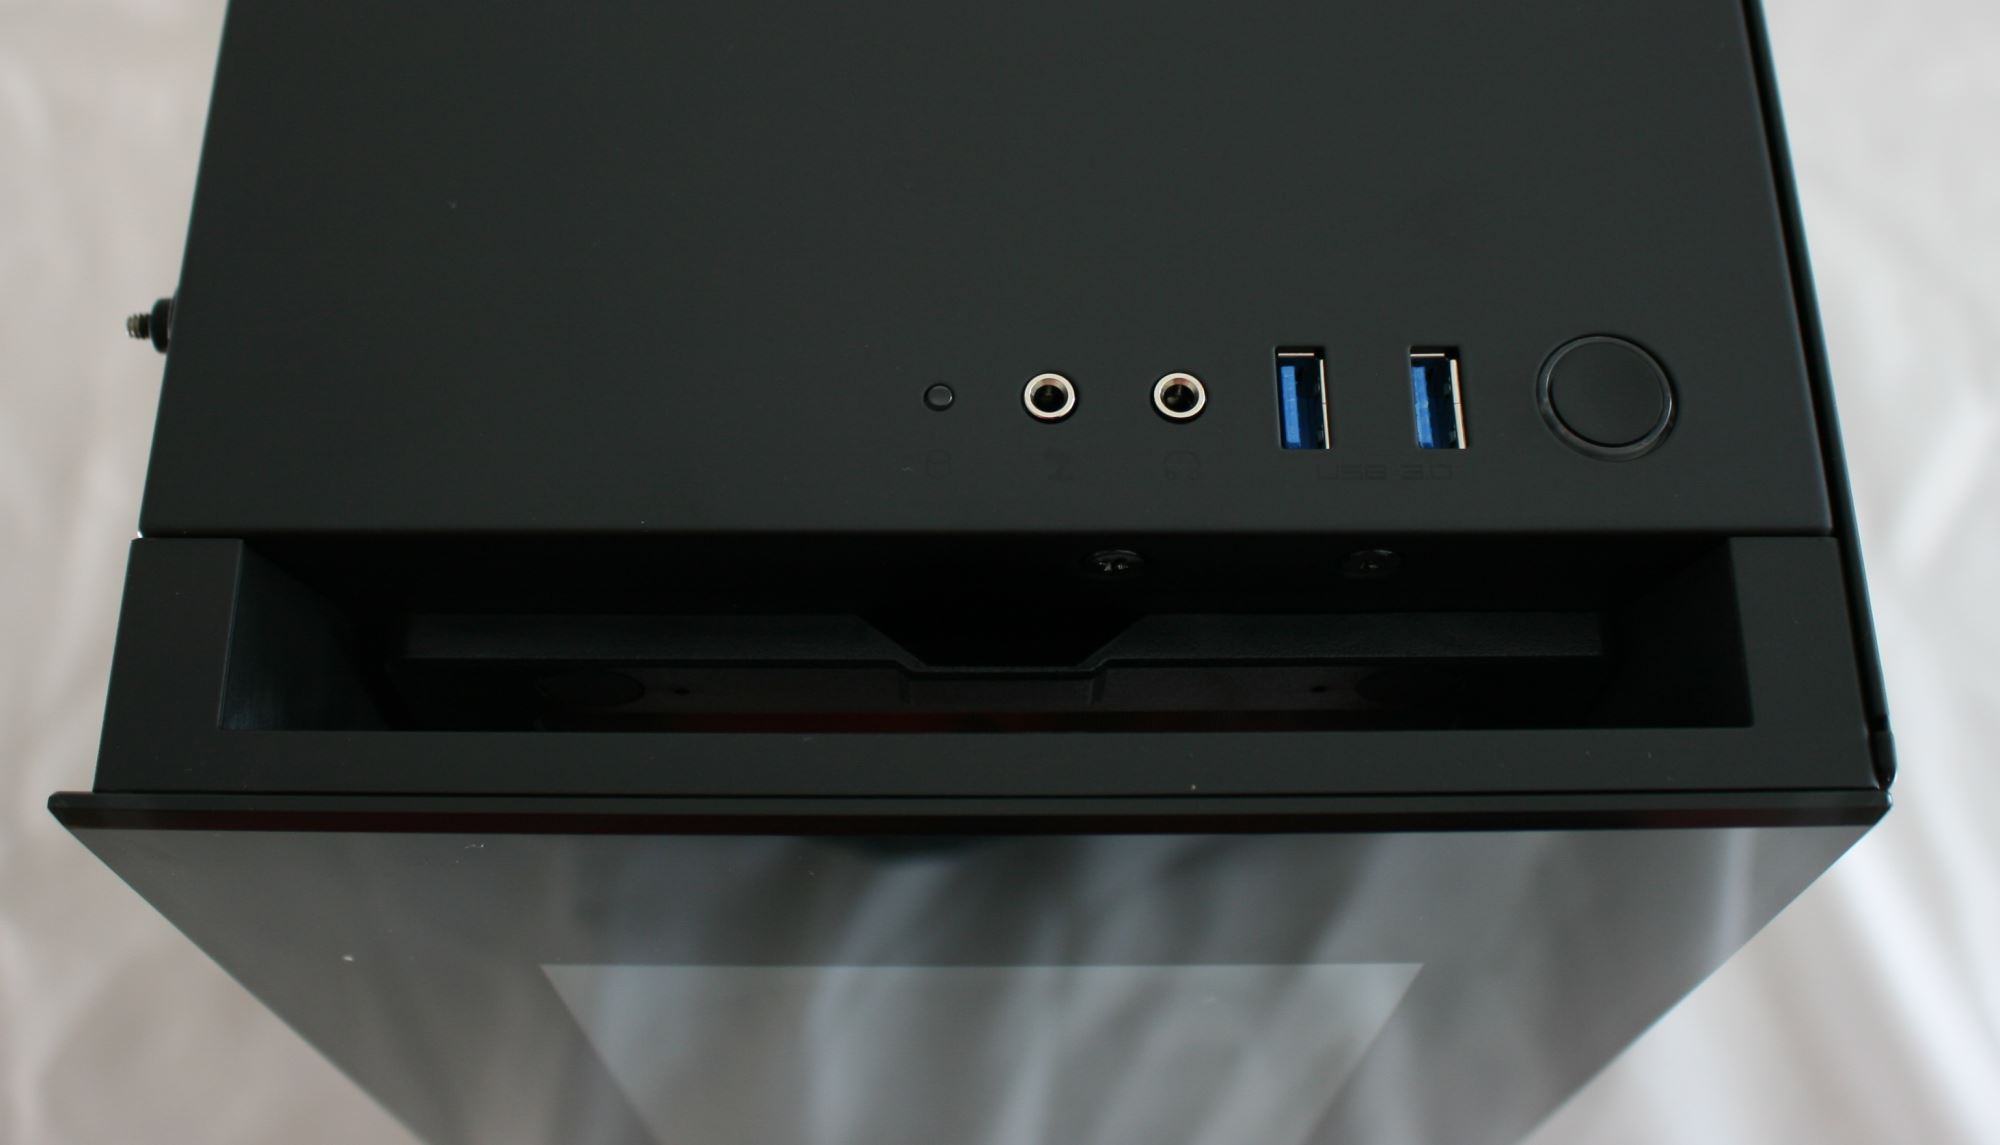
Last but certainly not least is the IO panel located on the top front part of the case. The panel consists of a power/reset button, two USB 3.0 ports, 3.5mm headphone and microphone jacks, as well as a HDD LED to display drive activity. I would like to have seen a USB 3.1 port of some sort here. The large gap in front of the IO area is where the air is able to come into the case and from the top is where one removes the front dust filter. There is a matching gap at the front bottom of the case for intake as well.
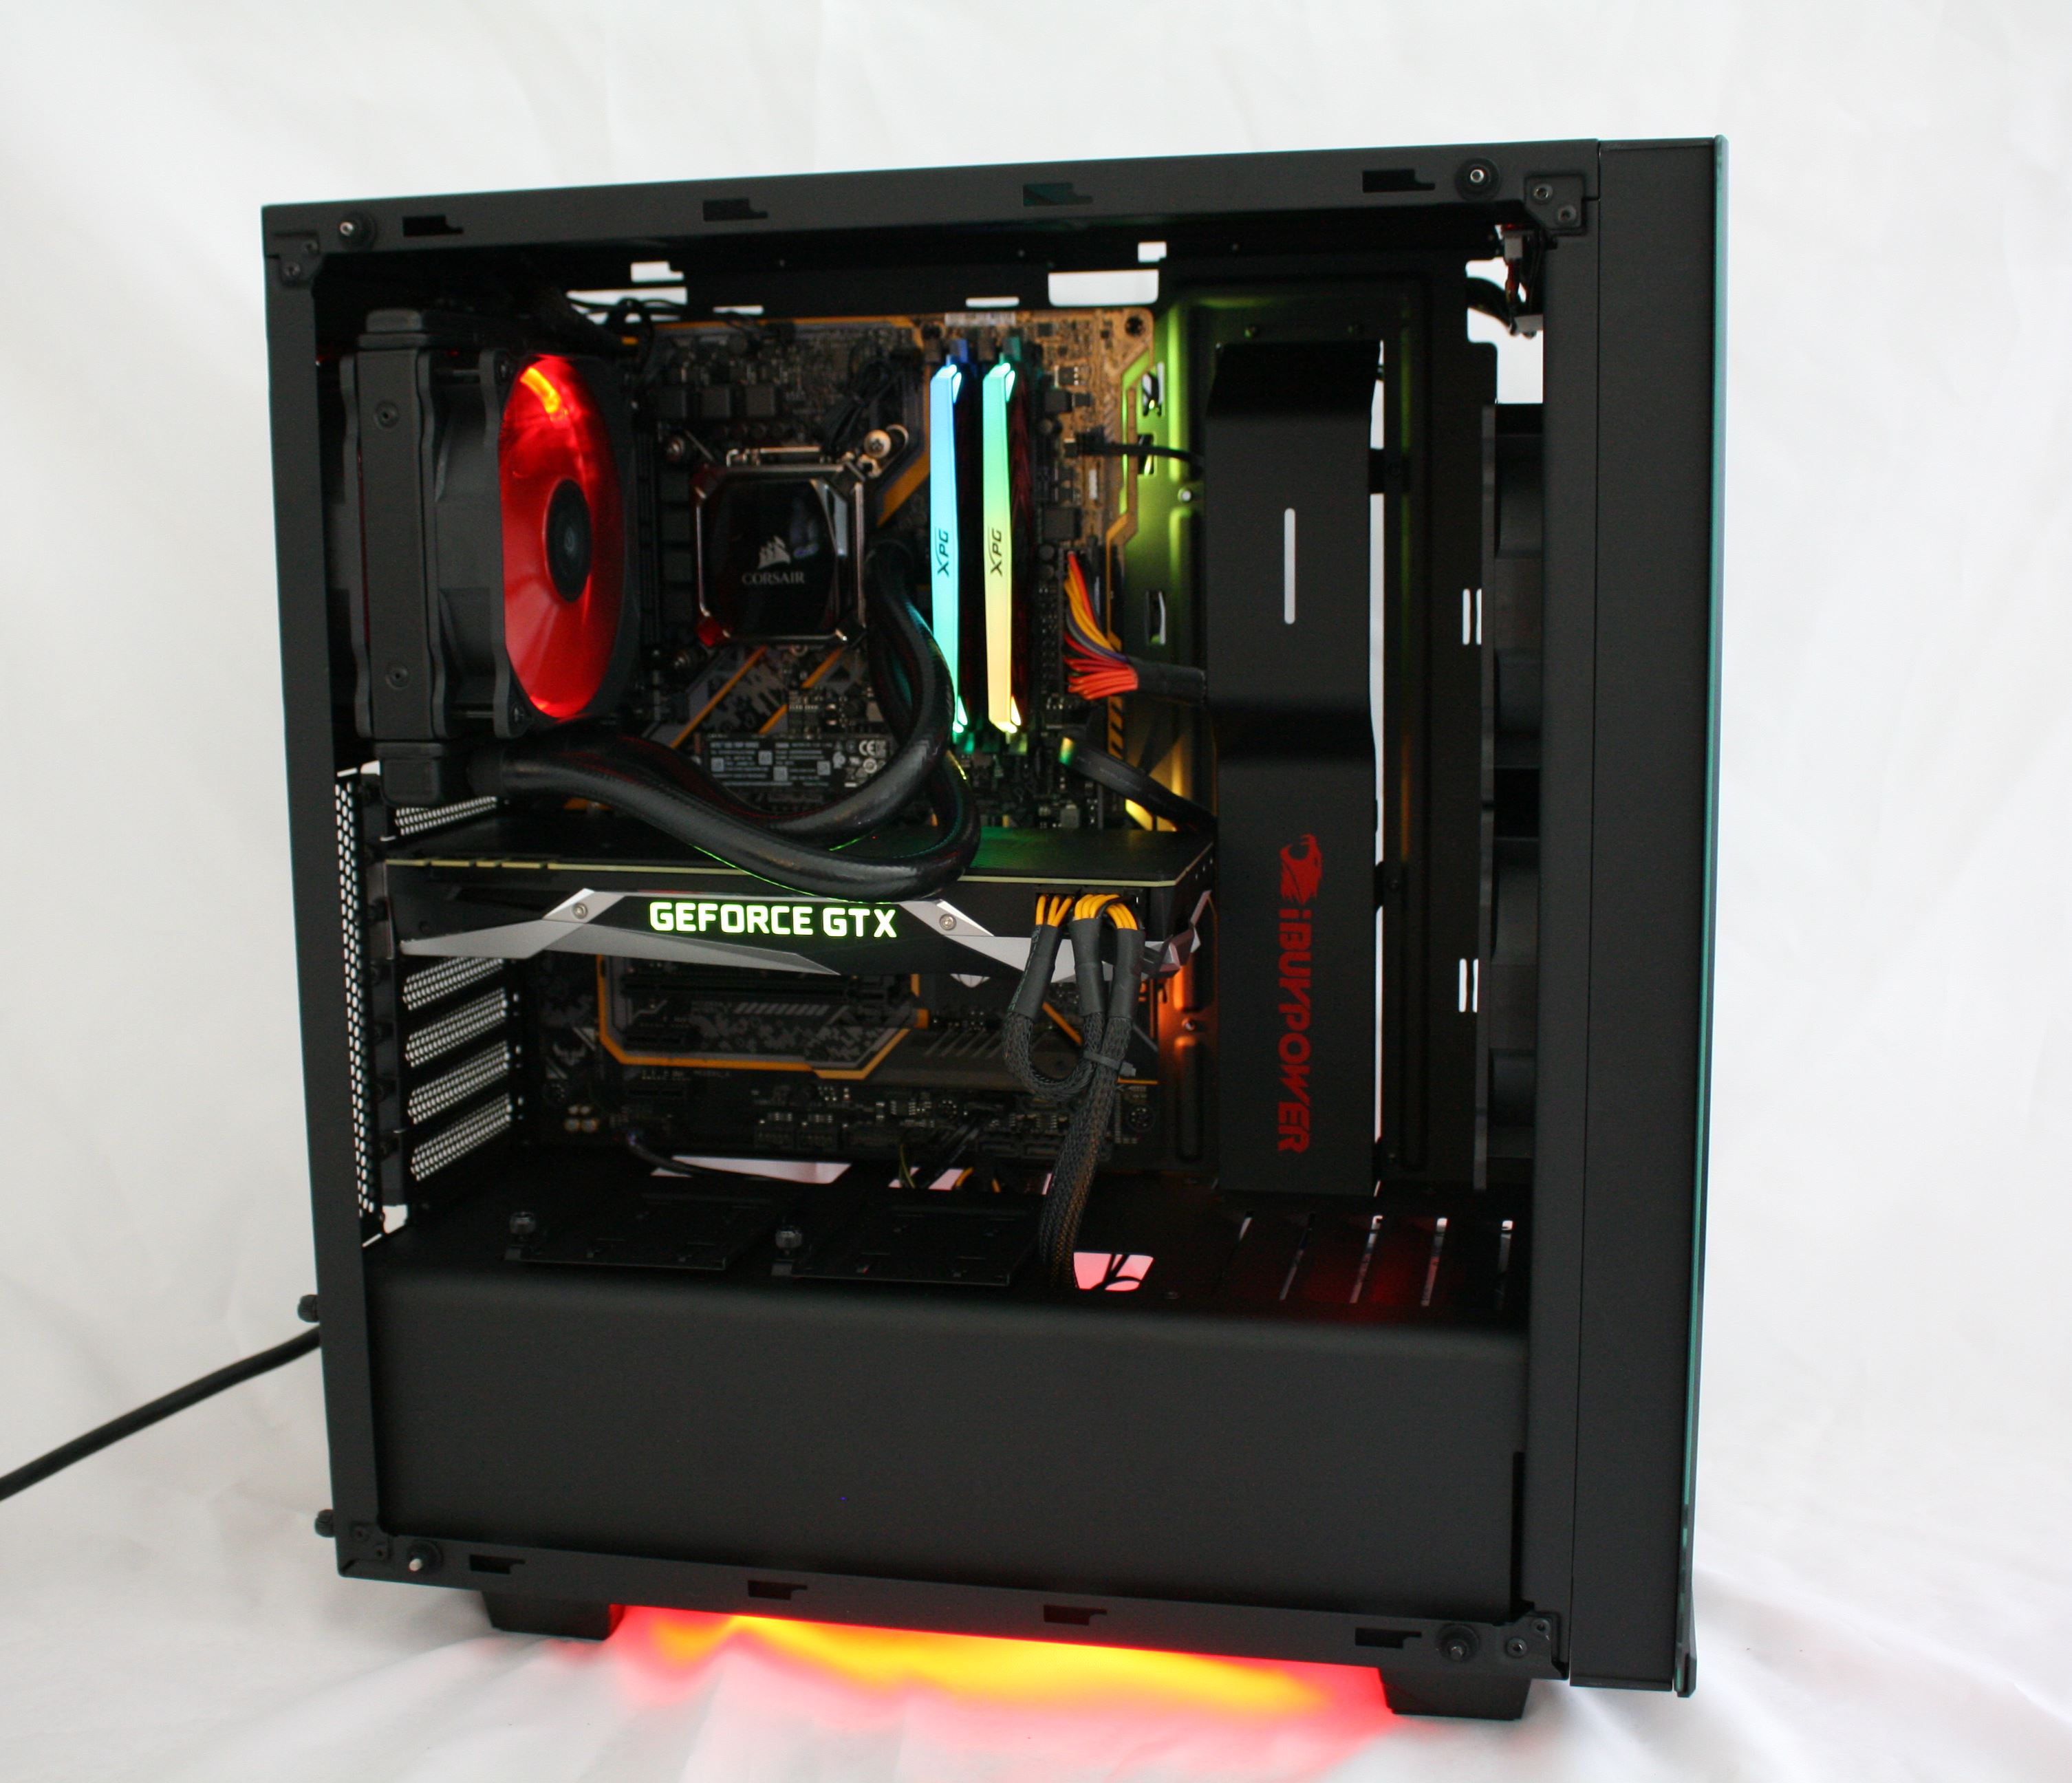
Overall, the chassis is well put together feeling sturdy even without the glass and other side panel removed. The tempered glass side and front panels have a black border on edges cleaning up the look so only the internals are exposed and not the frame of the chassis. There is plenty of room to route cables and shrouds to hide them, and iBuyPower did a pretty good job of tidying them up at the factory. iBuyPower's red LED implementation on the included fans and the strips on the bottom of the case cannot be changed, however, the LEDs on the ASUS TUF Z370-Plus Gaming motherboard as well as the ADATA RAM can be controlled through the ASUS AURA software. The case has ample airflow capabilities and can handle the heat without issue.


In the Box
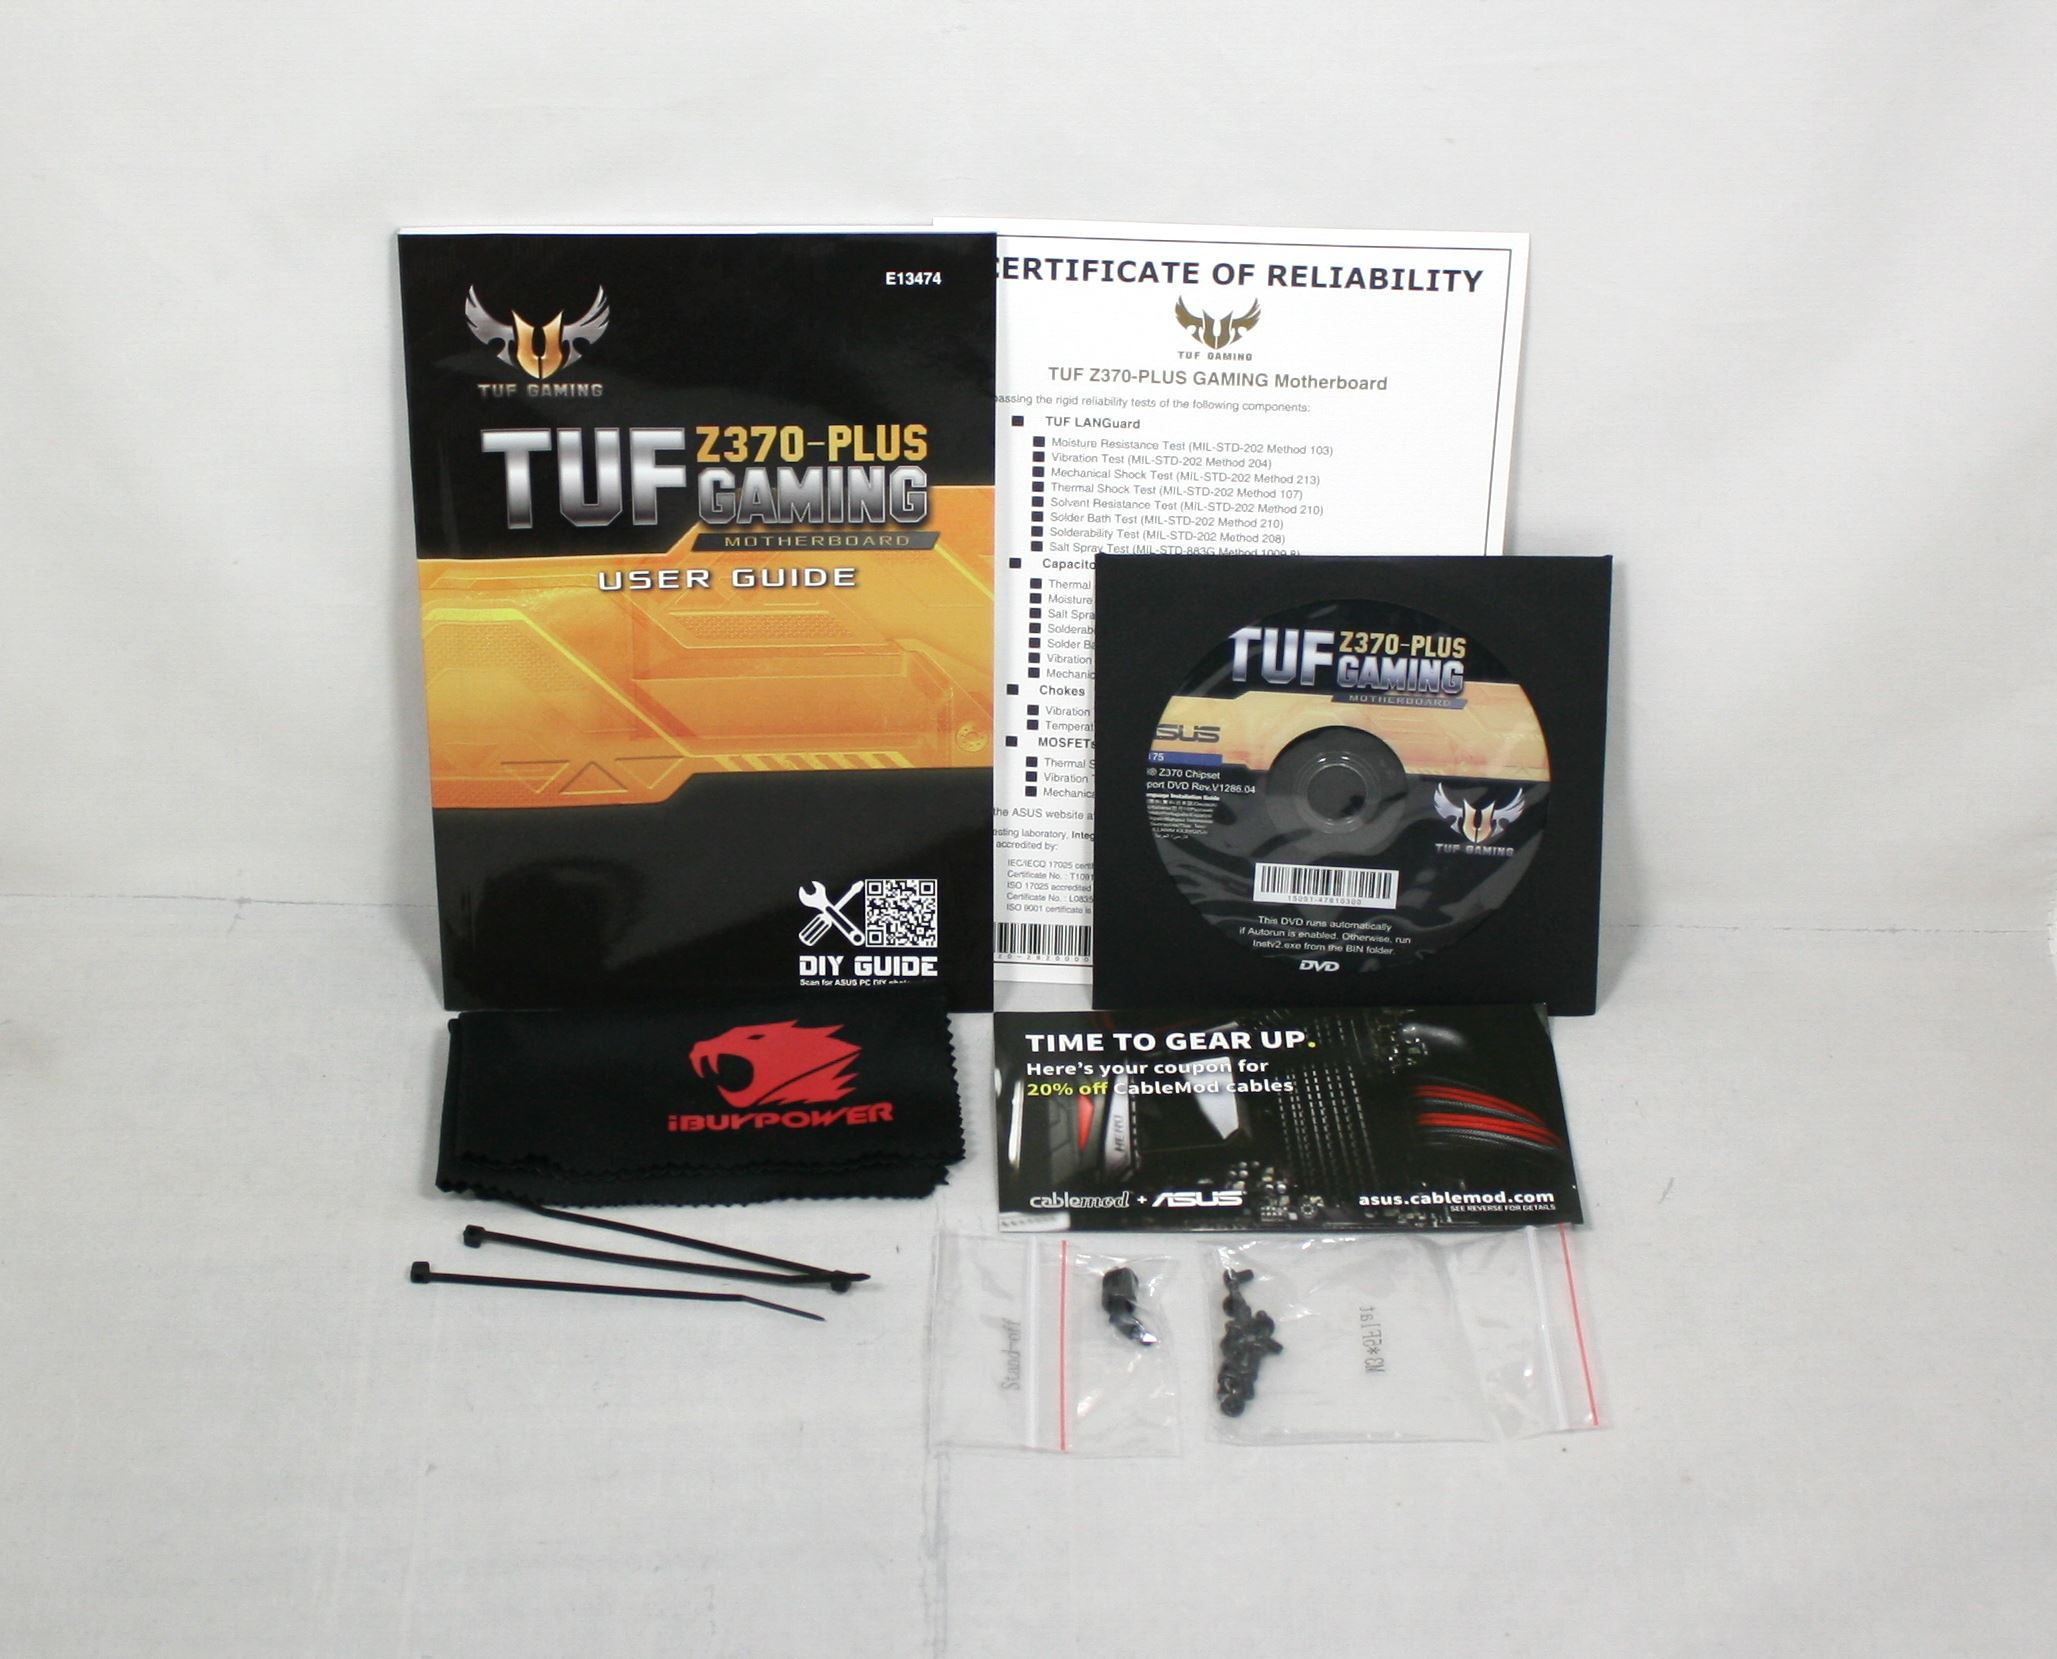
Inside the iBuyPower Box was a frosted bag which contained all the included accessories. We see an ASUS TUF Z370-Plus Gaming user guide, driver disk, some screws and zip ties. There isn't too much here, but in buying a complete system like this, there isn't much one needs to get started or extra. That said, I would like to have seen an extra SATA cable or two included to more quickly add SATA based storage.


50 Comments
View All Comments
1_rick - Friday, July 6, 2018 - link
Well, you should certainly use care taking it out, and (at minimum) discharge static, or better yet, ground yourself first.I'm not sure if that's Styrofoam or not--it's pretty cool: expanding foam that will shape itself to the insides of the case it's put in. I bought a CyberPowerPC last year that had the stuff. I don't remember it being staticky when I took it out.
Aside: I took the computer back because of some issues I had with it. One thing I did not like was it was a mid-range Ryzen, and CyberPowerPC had replaced the stock Ryzen HSF with a cheap combo that included a 3-pin fan that ran at something like 3000RPM all the time, even when the PC was idle. As you can imagine, it was pretty annoying. I don't know why they would've put an inferior component in that case.
Flunk - Friday, July 6, 2018 - link
OEMs buy CPUs by the tray without heatsinks, there was nothing to replace. They probably got that cooler cheap. That's exactly the sort of cost-cutting I'd expect in a white-box system like this.PeachNCream - Friday, July 6, 2018 - link
Why am I seeing stock photos/renders when there's a physical product being tested and ample time to take photos of it? I don't care about fake marketing version. I want to see what was shipped and reviewed.Ryan Smith - Friday, July 6, 2018 - link
We actually use stock photos fairly frequently. Sometimes it's hard to get a great photo of a product, especially something this glossy with integrated lighting. Those $5K DSLRs and professional photo editors definitely make a difference.PeachNCream - Friday, July 6, 2018 - link
That's perfectly reasonable for a motherboard or some other non-changing single component where one will be identical to another. In the case of a system where the actual hardware configuration is different from the stock photos, it leads to a jarring experience.Also, take a read through the visual inspection and unboxing page. It's got some awkward wording here and there and could use some editorial massaging.
Craig234 - Friday, July 6, 2018 - link
The goal of the photo should be accurately communicating the product info, not looking as pretty as possible at the expense of not being as accurate, shouldn't it?That's a little like a wedding photographer returning outstanding photos with great backgrounds and lighting of another couple, saying the top effects weren't possible at their wedding.
DanNeely - Friday, July 6, 2018 - link
The difference is that wedding photographers are supposed to be experts at taking pictures with high end cameras. Product reviewers are supposed to be experts at the product category they write about; unless that's reviewing cameras pro level photography isn't a job requirement.Death666Angel - Friday, July 6, 2018 - link
At least give us a picture caption or a mouse over text that tells us if it is a stock photo or one of the tested configuration.Ryan Smith - Friday, July 6, 2018 - link
Indeed. We aim for great photos regardless, but there is a practical limit to what a guy working out of his home office can do versus a pro photographer with dedicated studio space.wolfemane - Saturday, July 7, 2018 - link
I gotta agree with the nit pickers here. The stock photos don’t really represent the product review. I’d think even a few cell phone pics would have been acceptable.For shooting pc hardware you don’t need a lot of space, or a lot of lighting. A small home office could easily accommodate the set up ( even with a metric ton of hardware benches everywhere). I know, my wife has a set up in my office for just that. A white box, couple of over head lights, and reflectors ( or whatever). All picked up on Amazon for basically nothing. And you don’t need a $5k dslr to shoot those. D750 or canon equivalent will run you $1500 with a good lense. Can’t tell me Anandtech doesn’t make enough for that kind of equipment? :)
Love the article, though. Don’t want to leave that out. IMO it was well written, and as always well laid out. And when was the last time a prebuilt was reviewed? Cool segment, again, IMO.