
Original Link: https://www.anandtech.com/show/2603
Spotswood Custom Computer Cases
by Derek Wilson on August 27, 2008 12:00 AM EST- Posted in
- Cases/Cooling/PSUs
Intro
At my house, we have a music room. Normally it houses a piano, a 5-piece drum kit, three acoustic guitars (one is a 12-string), one electric bass, a djembe, two amps, a cheap 8-channel ADC (balanced to light pipe), two PA speakers, a few mics, and a computer. For us, it's all about functionality: we like to play music and sometimes we even like to record what we do. We're not professional musicians, but we enjoy our hobby.
While I'm quite lucky my wife shares my interest in music (and it was still difficult to convince her that we really didn't need a dining room), she doesn't really like having computers randomly strewn throughout the house. Actually, that's putting it nicely. Regardless of the fact that it is useful to have a computer in the dining... err... music room, she still doesn't like the fact that it looks out of place and messy. Granted I don't use cases at all in my house, but even a standard monolith of a computer case wouldn't do much to impress.
Different people have different preferences, and I generally hate generalizations. I feel like the key is to understand generalizations have plenty of exceptions, and just go from there. It does seem that women tend to place more value on the appearance of things in their home than men do. Sure, there are neat and organized men out there (I'm not one of them), but the hard and often downright ugly look of technology seems more often to be excused by men than women - and that's perfectly fine. Why shouldn't technology be functional or beneficial and fit the décor of a room?
The trend to improve the WAF (or Wife Acceptance Factor) of technology has been increasing in the CE market, as the industry has begun to realize that it is ridiculous not to address the desires of people who place a high value on the comfort, look, and feel of their home. There are people out there who want technology and the benefits it can bring into their lives, but who aren't willing to sacrifice their comfort to attain it. After all, we have to live in our homes and we see the things in our homes every day. If the simple look of something in your living space offends you, that's simply not acceptable.
The PC industry hasn't gotten as much attention as the CE industry in this area. With the exception of the HTPC, the desktop computer isn't really a living room sort of device. However, what about those people who want and need access to a powerful computer that will be positioned in an exposed prominent area of the house? You can't fit a full sized ATX system with a quad-core CPU and a RAID array into an HTPC case. Besides, go look at the cost of nice looking furniture, and suddenly a few extra hundred dollars to make your PC fit the décor is a pittance! There are people willing to pay a lot of extra money for something that has the right aesthetics, so it's hardly a surprise to see PC manufacturers catering to their needs.
In our search for something workable, we stumbled upon a very interesting oddity at Spotswood Custom Computers: a round, wooden PC case. It even looks like a kick drum. Hell, you can even get one with drumheads on it. How awesome is that for an extension of music room décor? Of course, with look taken care of, we do need to investigate functionality. This thing needs to be capable of everything any other computer case is able to handle and more. Can it meet your look-and-feel needs while also providing a robust computing solution?
While Spotswood builds each case to order (which means the cases can be customized to exactly fit the needs of your computer), they are all variations on a theme. The basic options are 18", 20", and 24" round cases in one of two styles: C and L. Spotswood sent us a C series case with the hardware required to turn it into an L series case. First, we'll look at the C-24 setup and then we'll look at it as an L-24. Following our look at the case itself, we'll install a system and document our experience.
The C-24 Case
This case is basically a wooden drum (think oil rather than musical) that lies on its side supported by four legs. While Spotswood can make C series cases out of more materials and in more colors than L series cases, the appointment of the design is a little spartan. There are options for the side panels as well, but ours are black and conceal the computer within (when we eventually get one in there).
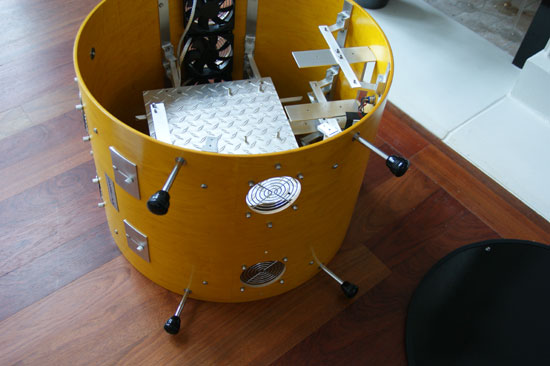
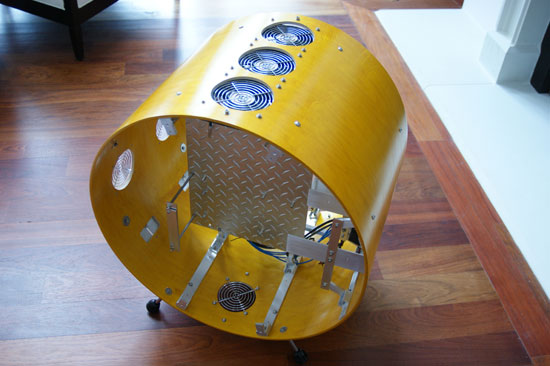
The top, bottom and back of the case (interestingly the back is where the Spotswood case badge is), both have room for lots of fans. This case comes with 3x120mm fans installed in the top three fan ports. The two rear ports can remain unpopulated, and we recommend leaving at least one of them without a fan for reasons we'll explain later.
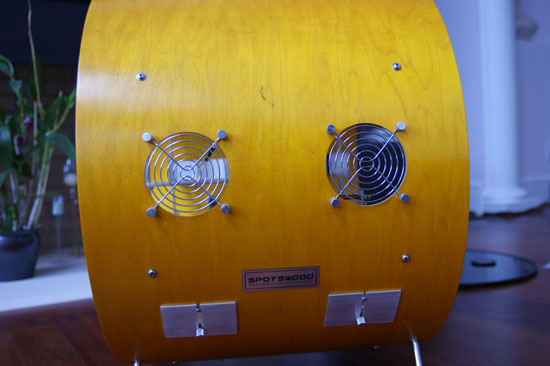
Those two metal covers with the thumbscrews are where you feed in lines to the outside world like power and video. PS/2 keyboard and mouse, network and other cables also go through these. Having two different ports for external lines can help to keep the back of this computer a little more organized looking than others with a reduction in accessibility to the actual spots these devices will need to be plugged in.
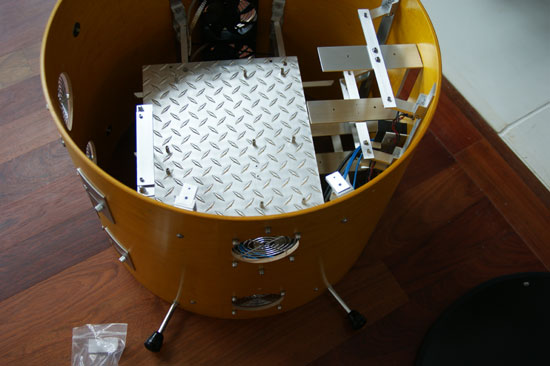
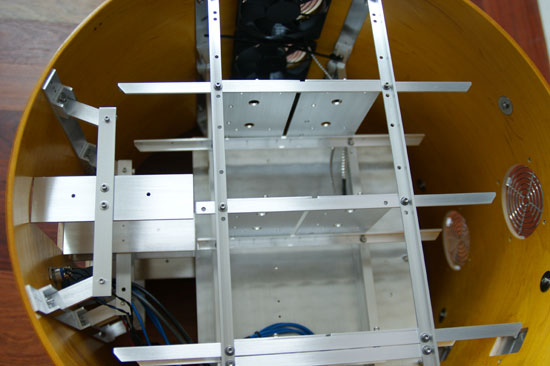
With the case on its side and the panels removed, we can look into the case and see the plate used for mounting the motherboard. Looking into the other side of the case we can see the mounting areas for the power supply and disk drives. The orientation makes this less like a traditional case shoved into a kick drum. Imagine taking the side panel out of a traditional case and mounting the drive rack and power supply on the outside of this panel and you've got something more like the internals of this case.
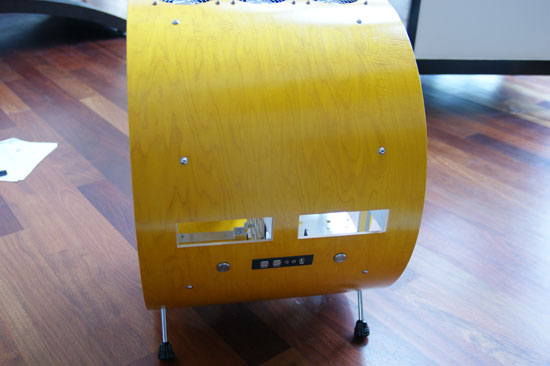
On the front, USB, IEEE 1394, and speaker connectors are available. We also have two spots for optical drives and power and reset buttons. The major difference between the C-24 and L-24 is the external appearance and additional hardware. Here are the rest of our shots of getting the C-24 set up with legs and ready to convert to an L-24.
The L-24 Case
The hardware required to convert the C-24 to an L-24 is pictured here.
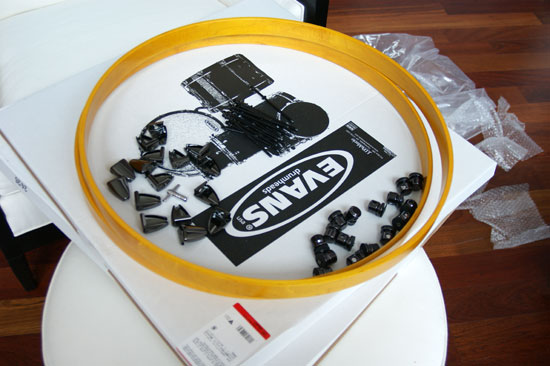
The process isn't difficult, but it is a little time consuming. First, remove the button screws around the outside of the case; then attach the lugs. Making sure they are vertical can be done by simply eyeballing things with a tension rod installed.
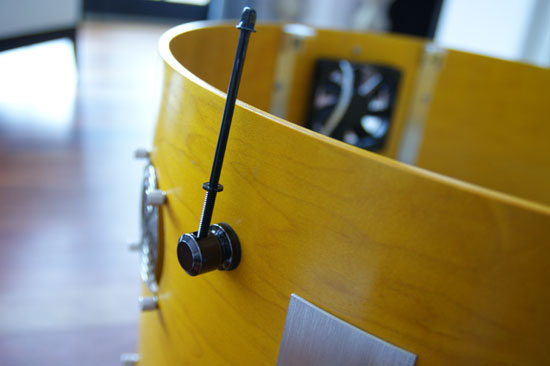
This isn't the most precise process, but we aren't actually building a musical instrument so we can sacrifice some of the accuracy we would otherwise want to maintain in putting this together. It's more about the way it looks in the end.
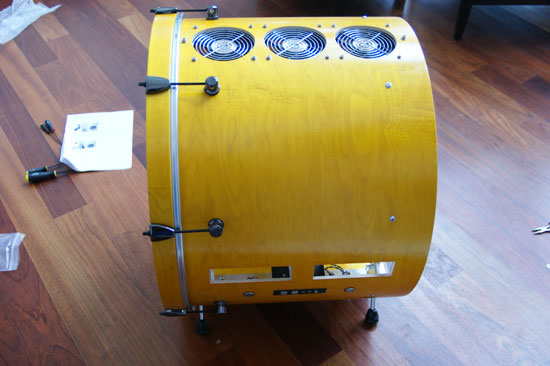
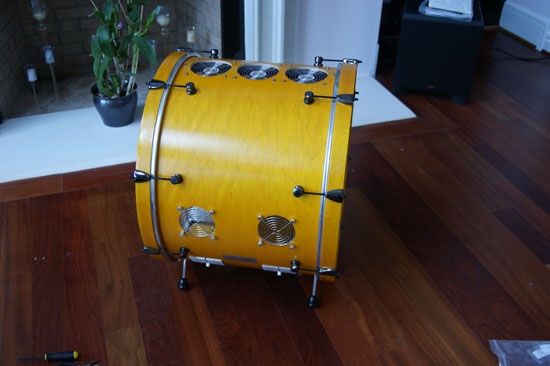
Going around one side and then the other, we attached all the lugs, set the drumheads on, and tightened down the rims. It actually really does look like a 24" kick drum. If you wanted to, just like with the C-24, you could have holes cut in the drumheads and mount fans in the sides of the case as well. Also, is it just me or is it a little odd to call the parts of this thing with the drumheads the sides?
Installing a System
Working with the largest box (err… cylinder) that Spotswood makes, we expected to have a lot of room to work inside the case. This is true to some extent. There is actually plenty of room for internally mounting radiators for water-cooling systems. However, the extra space doesn't really do as much for ease of install and system access as we would normally expect from a large case. Don't look for anything highly modular, and while there are some thumbscrews, most of the work will be done with a variety of hex screws (the kit actually does come with tools, but you might need to supply your own wrench or pliers for holding some of the nuts at the back of some screws).
This case is not for the faint of heart. The two types of people we would recommend taking on the challenge are those with a lot of experience fighting cases (who have built a lot of PCs) or people who just like building stuff in general (and are comfortable improvising a solution if need be). If you're looking for a quick PC build, you'll want something else - but then you're not going to get a "drum" case, of course.
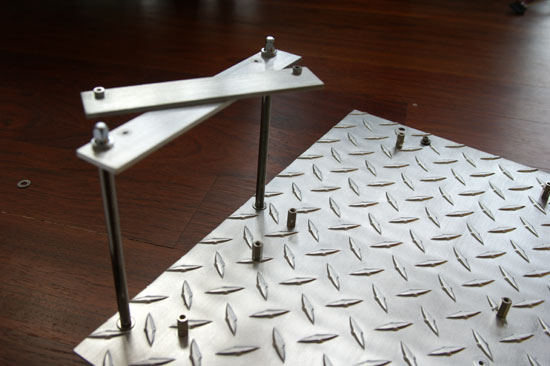
After removing the side panels, we remove the motherboard tray. Rather than having individual screws for each expansion card, it has two flat pieces of metal that sandwich the mounting brackets for the cards. This is pretty straightforward.
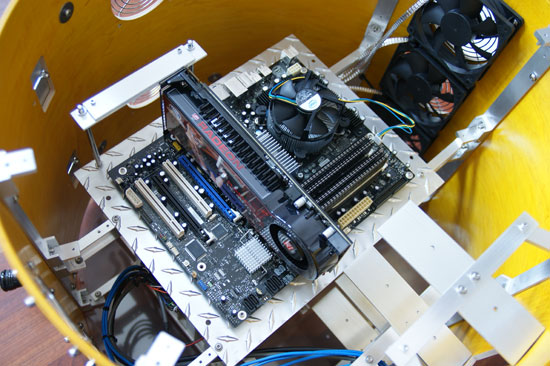
Installing the motherboard and add-in cards is simple enough, as is dropping the tray back into the system. I would actually recommend holding off on putting the tray back in until after installing the power supply and drives, as things are a little easier to reach this way.
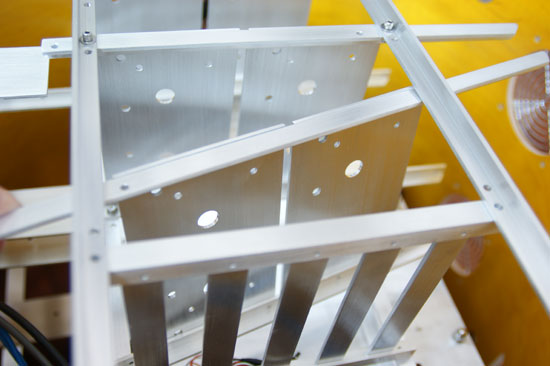
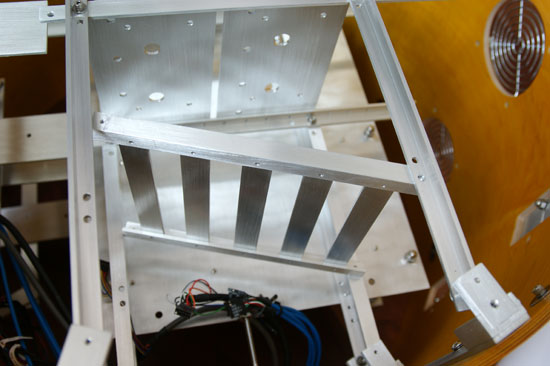
Turning over to the power supply, the instructions state that we may need to remove the lower hard drive mounting bracket in order to fit an oversized power supply. As we wanted to use our 1200W PCP&C PSU (which is definitely large), we did need to remove this hardware.
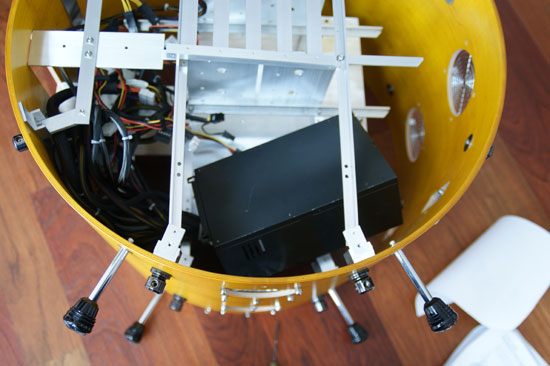
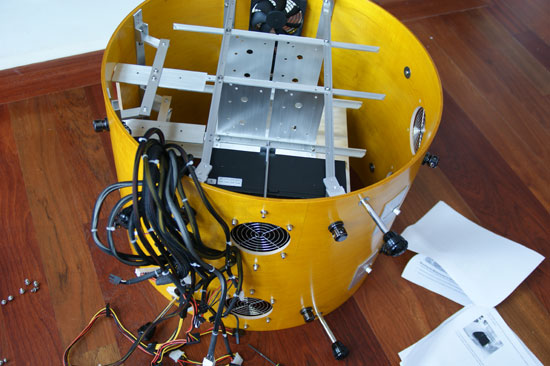
Even after this, it was a bit tricky to get the PSU to fit. If you are going with this case to build your prized enthusiast system with 3-way SLI or 4-way CrossFire, RAID arrays, and other goodies (with a matching power guzzler of a PSU), you might have to spend some time coaxing everything into place.
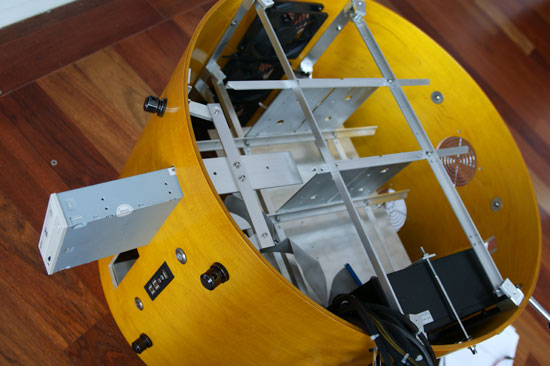
Optical drives install through the front. Standard drive bay covers likely will not work on this monster, and they will definitely mar the exterior. You can see we left one side open, which looks out of place on such a case. Since these things are custom, it's a good idea to only have Spotswood cut as many external drive bays as you need.
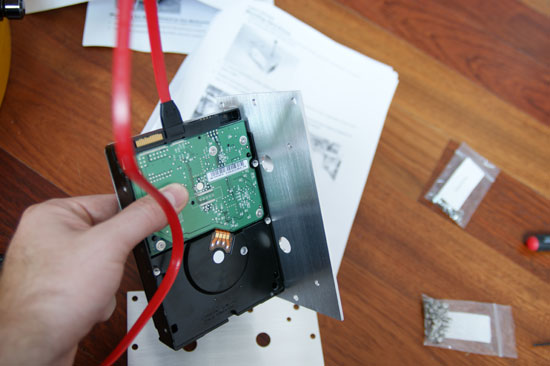
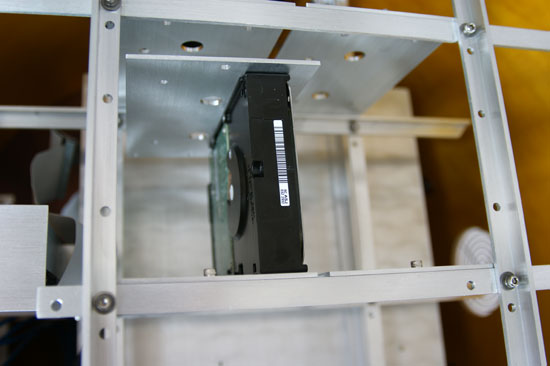
Mounting hard drives involves screwing them into plates and then screwing those plates into the rack.
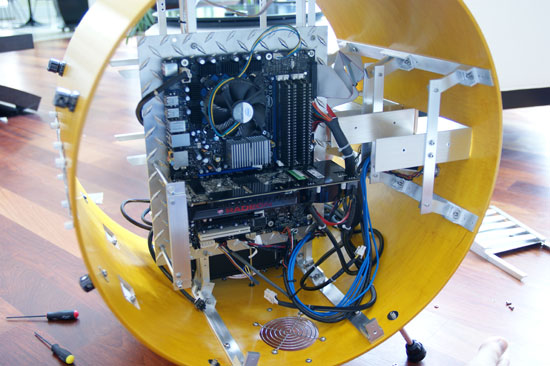
Plugging everything in was not easy, even with the long cables on our PSU. Despite the fact that the PSU is basically mounted right behind the motherboard, the cables start at just about as far away as possible from where they need to go. We had to finesse our 8-pin EPS12V power connector around the back, and we fought for every millimeter.
Here is the full gallery of our build process.
Notes on Cooling
This case isn't designed with conventional airflow in mind. Normally we want airflow directed in from the front and out of the back of a case, passing over the components inside. The main exhaust for this system is meant to be the top (which isn't a bad idea: heat does rise anyway), but the orientation of the board is wrong for optimal airflow over the components. Additional fan mounts are on the back and side, but there's no mount or intake on the front (though you can probably have one added by request). You can also reverse fan direction as you see fit, but you'll want to avoid creating extra turbulence so adding intake fans on the bottom makes the most sense.
In reality, this case is meant for water-cooling everything - and we mean everything. The system comes with mounting brackets to attach a radiator to the 120mm fans at the top exhaust port, offering quite a bit of airflow and room for a nice large radiator. This is a good design for a water-cooling system, and definitely the best way to go in terms of cooling the system inside.
It is possible to attach fans and radiators to the rear and bottom fan portals as well, but we would recommend adding an intake portal to at least one of the side panels if you plan to mount three internal radiators. Actually, leaving at least one of the rear fan portals free will help out a lot, as there is no easy way to reach the rear panel on the mobo, the PSU hard power switch, or any other cables going into the system from the back. Of course, if you leave one of these rear fan portals free, you can just take out three thumbscrews and reach right into the system to do whatever you need.
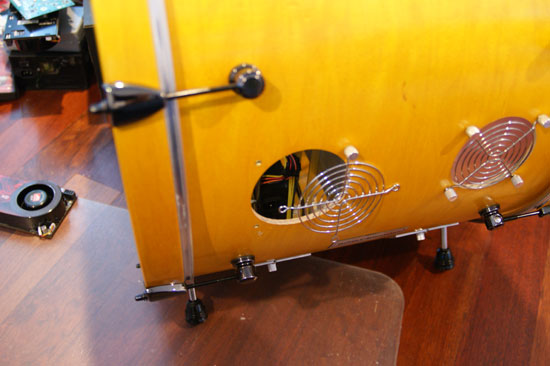
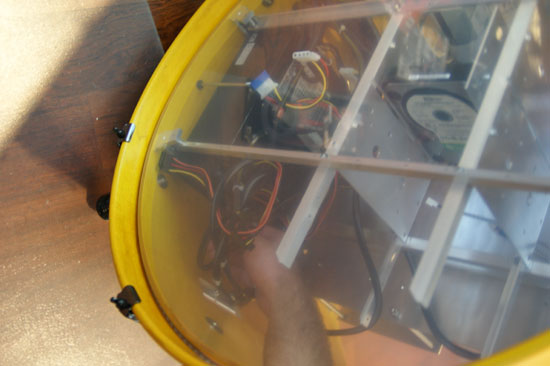
Our recommendation on cooling a system configured like ours (i.e. without water-cooling) is to use the bottom fan portals for intake (with intake fans) and use the top and rear for exhaust. The rear exhaust nearest the expansion slots on the mobo will be important if you are not water-cooling your graphics card, as you will want something to direct the air from the graphics card away from the rest of the system - normally, high-end GPUs vent directly out of the case, but this design prevents that. Water-cooling everything (including the graphics card(s)) with two radiators and intake fans on the bottom is probably the best option.
The one chink in the armor is that the PSU will still exhaust into the case in an area that is not near any fan portals and happens to be right under the hard drive array area. I've had more than one hard drive die via overheating, so I would look at adding some internal fans to move air around the drives as well. A solution might be a small exhaust portal on the front near the bottom
With an enthusiast system inside, properly cooled, this will not be a quiet computer. Of course, you could go another way and just attach an industrial fan to the front or back and create a wind tunnel across the system. Yeah, that might work...
Final Words
Okay, so this isn't as thorough as our usual case review, but this case isn't built for functionality: it's built for style. Each case is custom made to order. These cases are ways to entomb your system in a work of art - and you'll really want to leave it there once you get it in, as breaking it down and building it up are not quick, easy, or fun tasks. This is a long-term solution that isn't meant to be constantly upgraded and tweaked.
We would not recommend these cases for the average enthusiast. They are not a general solution for any normal system build. These cases are for the true hobbyist who really wants something that looks different from a normal computer case. As a drummer, I see the appeal of the L style, but I'm not really impressed with the C style. I'm sure others who are into differently appointed cylindrical objects might have an affinity for the C style, but either way these system are something you will buy for the form over the function.
That said they do function. They'll get the job done, but are probably more suited to the affordable borderline enthusiast system rather than the all-out highest performance possible options. A good-sized power supply, only a few drives, and a graphics card that isn't going to heat your house in the winter are a good fit with this case. Spotswood's cases will require a little more TLC to get them set up just the way you want them. Of course, some people get off on that. The more work you put into a thing the more pride you can take in its display. (I used to build model airplanes as well.)
Then comes the price. The sale price is currently $465 on the base 24" C and L models. With all the fans, the color options, extra mounting hardware, etc. the case we have for this review as configured would be $707 (or $617 for the C style case equivalent). While this is quite steep, this is not unreasonable for a custom case like this. If you want to do all the work yourself, you could spend $250 to $300 on a cheap kick drum and start building, but that's going to be quite a lot of work and is very likely more difficult than most of us are willing to take on.
As the industry continues to develop, and as adoption of computers starts to saturate, there will need to be different twists on the theme in order to inspire further adoption of the technology. We don't all have server closets, and while notebook adoption is growing, there is a lot to be said for having a home server for storing all your music, movies, and video games. Getting technology into homes isn't always about what the technology can do for us but whether it will fit into our life style enough for us to give it a chance.
Honestly, if you want a computer mounted inside a drum, buying it from Spotswood is the way to go. Round cases are certainly interesting and out of the ordinary, but definitely not for everyone. The internals could be a bit easier to work with, but it is a whole lot easier than building your own round case. Cooling and airflow might be an issue, and we recommend the use of water-cooling if possible. If looks are important and you just want a round case or a case that looks like a kick drum, then the extra hassle and work will probably not be a deterrent. For everyone else, the ease of use and modularity of traditional case designs are far superior to these round cases that bring nothing extra to the table for the majority of enthusiast PC builders and owners.


