The GIGABYTE MZ72-HB0 (Rev 3.0) Motherboard Review: Dual Socket 3rd Gen EPYC
by Gavin Bonshor on August 2, 2021 9:30 AM EST- Posted in
- Motherboards
- AMD
- Gigabyte
- GIGABYTE Server
- Milan
- EPYC 7003
- MZ720-HB0
BIOS
When it comes to the firmware on the GIGABYTE MZ72-HB0, it's nothing fancy, flashy, or glossed over for consumers to eyeball. It is using a basic and archaic-looking Aptio AMI firmware version, which focuses on functionality and substance over style. The GUI is basic, with a deep blue edging and scroll bar, with the help menu text in the bottom right-hand corner also in the same blue. The text is a well-contrasted black with a light grey background, which makes everything easy to read.
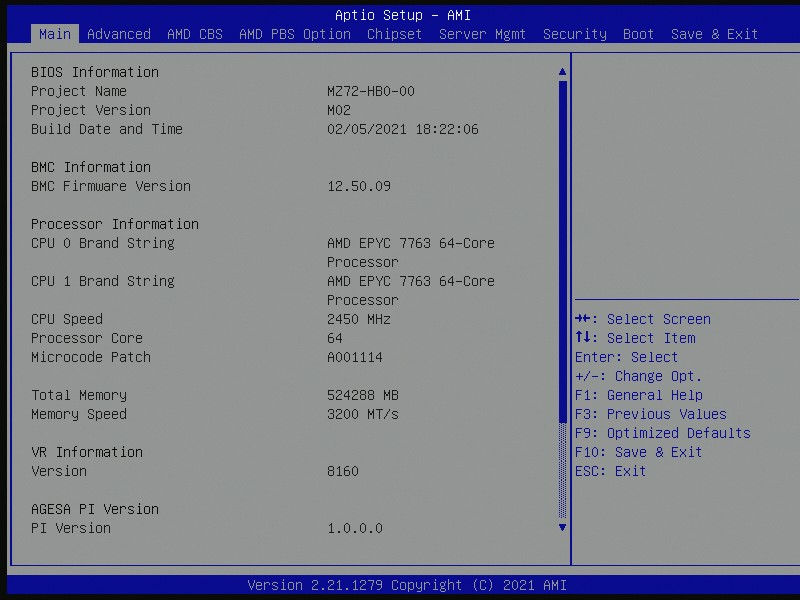
Entering the firmware, the main screen has a basic list of information that includes the firmware version that is currently being used, as well as basic information on the processors installed; in this case, two AMD EPYC 7763 64-core and 128-thread Zen 3 processors. It includes the base clock speed, as well as the core count, and also includes a combined total of installed memory with its speed in MT/s (it's great to see some vendors using the correct definition of Megatransfers per second).
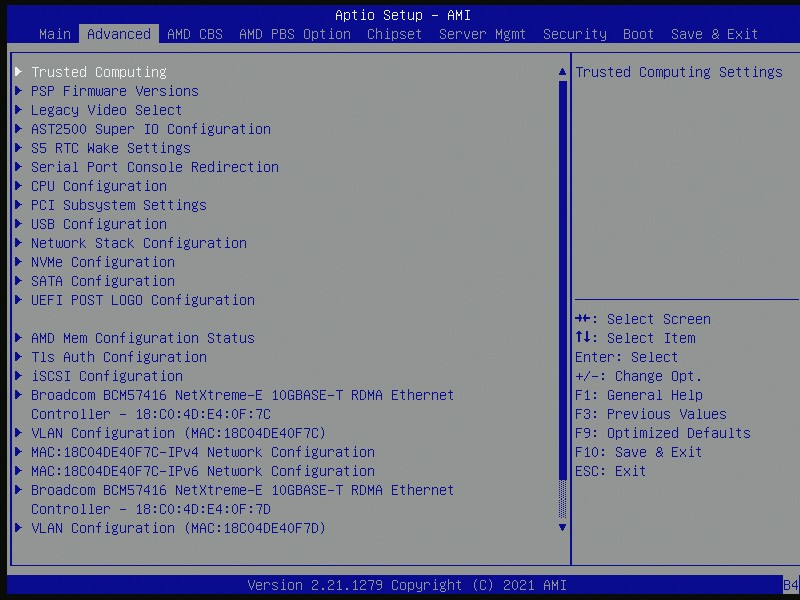
The BIOS itself has very deep and contrived menus and options for users to delve into. Along the top, there's the Advanced section with options for Trusted Computing, ASPEED BMC configuration, CPU, USB, PCI, and storage configuration. Users can also alter and customize the MAC address settings for gaining access to the system across a network using the Gigabit Management Ethernet port on the rear panel.
Other menus include the AMD CBS and PBS options for power limitations, and altering Precision Boost Overdrive settings, while the Chipset menu includes options for enabling or disabling the PCIe compliance mode. There's also a dedicated menu for Server Management, where users can also configure the BMC networking settings, as well as view FRU information. The Security menu allows users to enable a firmware level administration and user password, especially if they want to keep non-essential users out of core settings, while the Boot menu allows users to customize the boot and POST order of any installed storage devices.


Overall the firmware on the MZ72-HB0 is functional, and with options aplenty, there's a lot of substance for users of multiple disciplines, including cloud, server, and workstation users.
Software/BMC
Although the GIGABYTE MZ72-HB0 doesn't come with a software bundle per se, it does include access to its MegaRAC SP-X browser-based interface. It includes both a JAVA and neat HTML5 based user interface, and GIGABYTE adopts a more modern look than previous years of its server-focused models.
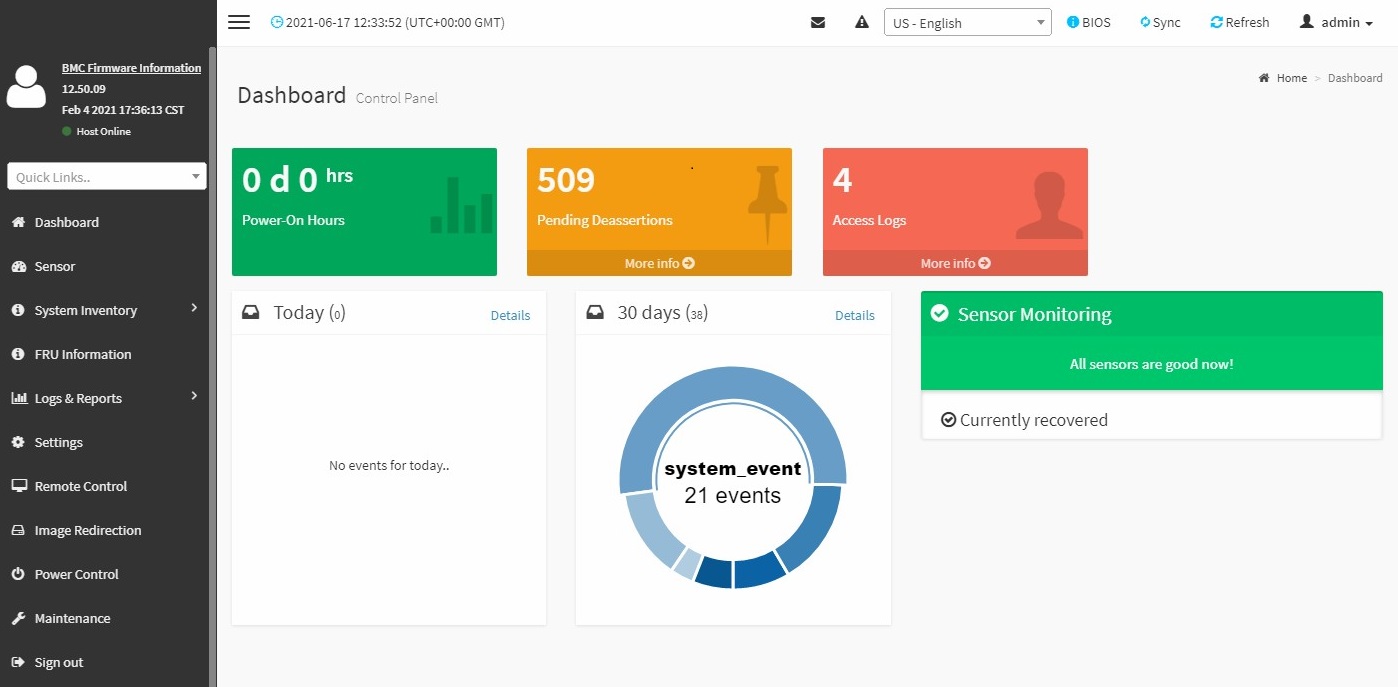
The GIGABYTE MegaRAC SP-X interface includes all the typical options of a board of this caliber should, including system inventory which shows the user's installed CPU, memory, storage, PCIe, and NIC inventories. Users can also look at the detailed information of the components in each of the subsections, as well as associated and supported technologies that can be used with the installed processor including hyperthreading, Execute Disable (XD), and if turbo mode is functioning or not. The MegaRAX SP-X interface also allows users to use BMC functionality, as well as powering up or down a system, as well as capturing BSOD, which is particularly handy if something isn't running as stable as it should.


There's also a load of security, power-related, and logging options available for users to sink their teeth into. As a board of this pedigree and for its functionality in server, workstation, and more intensive use cases such as cloud servers, it looks to be fully equipped from an access interface point of view. Users can even flash the board to the latest version of the firmware over the interface and BMC, as well as save and load up pre-saved configurations for deploying the same settings across multiple servers/systems.
Overall the GIGABYTE MegaRAC SP-X is functional, easy to navigate, has a plethora of options for users to monitor and alter, and it's very good to look at too.


28 Comments
View All Comments
Grayswean - Monday, August 2, 2021 - link
256 threads, 1024 bits of memory bus -- resembles a low-end GPU of ~5 years ago.Oxford Guy - Tuesday, August 3, 2021 - link
What ‘low-end’ GPUs came with more than a 128-bit memory bus?bananaforscale - Friday, August 6, 2021 - link
You need HBM to go past 1024 bits, or compute cards. Low end is 64 to 128 bit bandwidth, and consumer cards don't hit 1024.Oxford Guy - Sunday, August 15, 2021 - link
Consumer cards did ship with HBM, in 4096-bit (Fury-X) and 2048-bit (AMD’s HBM-2 cards) as I recall. However, none of those were priced for the low end.Threska - Monday, August 2, 2021 - link
"In terms of power, we measured a peak power draw at full load with dual 280 W processors of 782 W."Looks like a new PSU is in order. Add in things like a GPU might push things over the edge.
Threska - Monday, August 2, 2021 - link
" It does include a TPM 2.0 header for users wishing to run the Windows 11 operating system, but users will need to purchase an additional module to use this function as it doesn't come included in the packaging."I assume Windows 11 doesn't use any on-chip TPM.
https://semiaccurate.com/2017/06/22/amds-epyc-majo...
Mikewind Dale - Monday, August 2, 2021 - link
Why did you measure long idle differently? I agree it's interesting to measure power consumption while turned off. But why conflate that measurement with other systems that are turned on with idling OSes?And that DPC latency looks terrible. I see several other EPYC systems in the chart that don't have anywhere near that bad latency. In fact, the lowest latency in the chart is achieved by an ASRock EPYC.
watersb - Monday, August 2, 2021 - link
2 x $7500 = $15,000 for two EPYC processors16 x $3600 = $57,600 for 4TB RAM
$1000 each for power supply, motherboard
Throw in an EATX chassis I have lying around
$75,000 before sales tax or storage.
I'd have to run a dedicated 15-Amp circuit to my main breaker box, well within a 1500 Watt spec for a standard residential receptacle.
Probably want to upgrade the UPS.
$100k ought to do it.
Mikewind Dale - Tuesday, August 3, 2021 - link
Just run a 20 amp circuit. Most of the cost is labor anyway, not the wire. The difference between the cost of a 15A wire and a 20A wire is trivial.jhh - Tuesday, August 3, 2021 - link
A 15A 120V circuit will not do it in the US, as continuous loading of that circuit only supports 1440W of continuous service. 15A x 120V x 80% derating for continuous service is 1440W. On top of that, if the UPS is recharging after a power outage, that power diverted to the battery has to come out of the circuit as well. Perhaps a 240V 15A circuit would work better. Otherwise, you would need one of those strange 20A plugs to use the sideways position in a 20A receptacle.